AWS Systems Manager Automationでタグを条件にEC2インスタンスを停止する
AWS リソースに対して設定されているタグを条件に自動で削除する方法を調べてみました。Lambda を使う方法も考えられますが、AWS Systems Manager Automation というものを見つけたので、この記事ではその使い方について学んだことをアウトプットします。
https://github.com/kntks/blog-code/tree/main/2024/10/aws-stop-instance-by-tag
| バージョン | |
|---|---|
| Mac | Sonoma 14.5 |
| Terraform | 1.9.5 |
Terraform で EC2 インスタンスを作成します。
.├── backend.tf├── main.tf└── provider.tfterraform initterraform planterraform applyEC2、RDS、Redshift、S3 など、さまざまな AWS サービスのメンテナンス、デプロイ、修復などの作業を自動化できます。 自動化を定義するには、事前定義済みのランブックを使用するか、自分で作成したランブックを使用します。
シンプルな実行で EC2 インスタンスを停止する
Section titled “シンプルな実行で EC2 インスタンスを停止する”事前定義済みのランブックを使用して EC2 インスタンスを停止してみます。
AWS のマネジメントコンソールから AWS Systems Manager Automation のページにアクセスします。
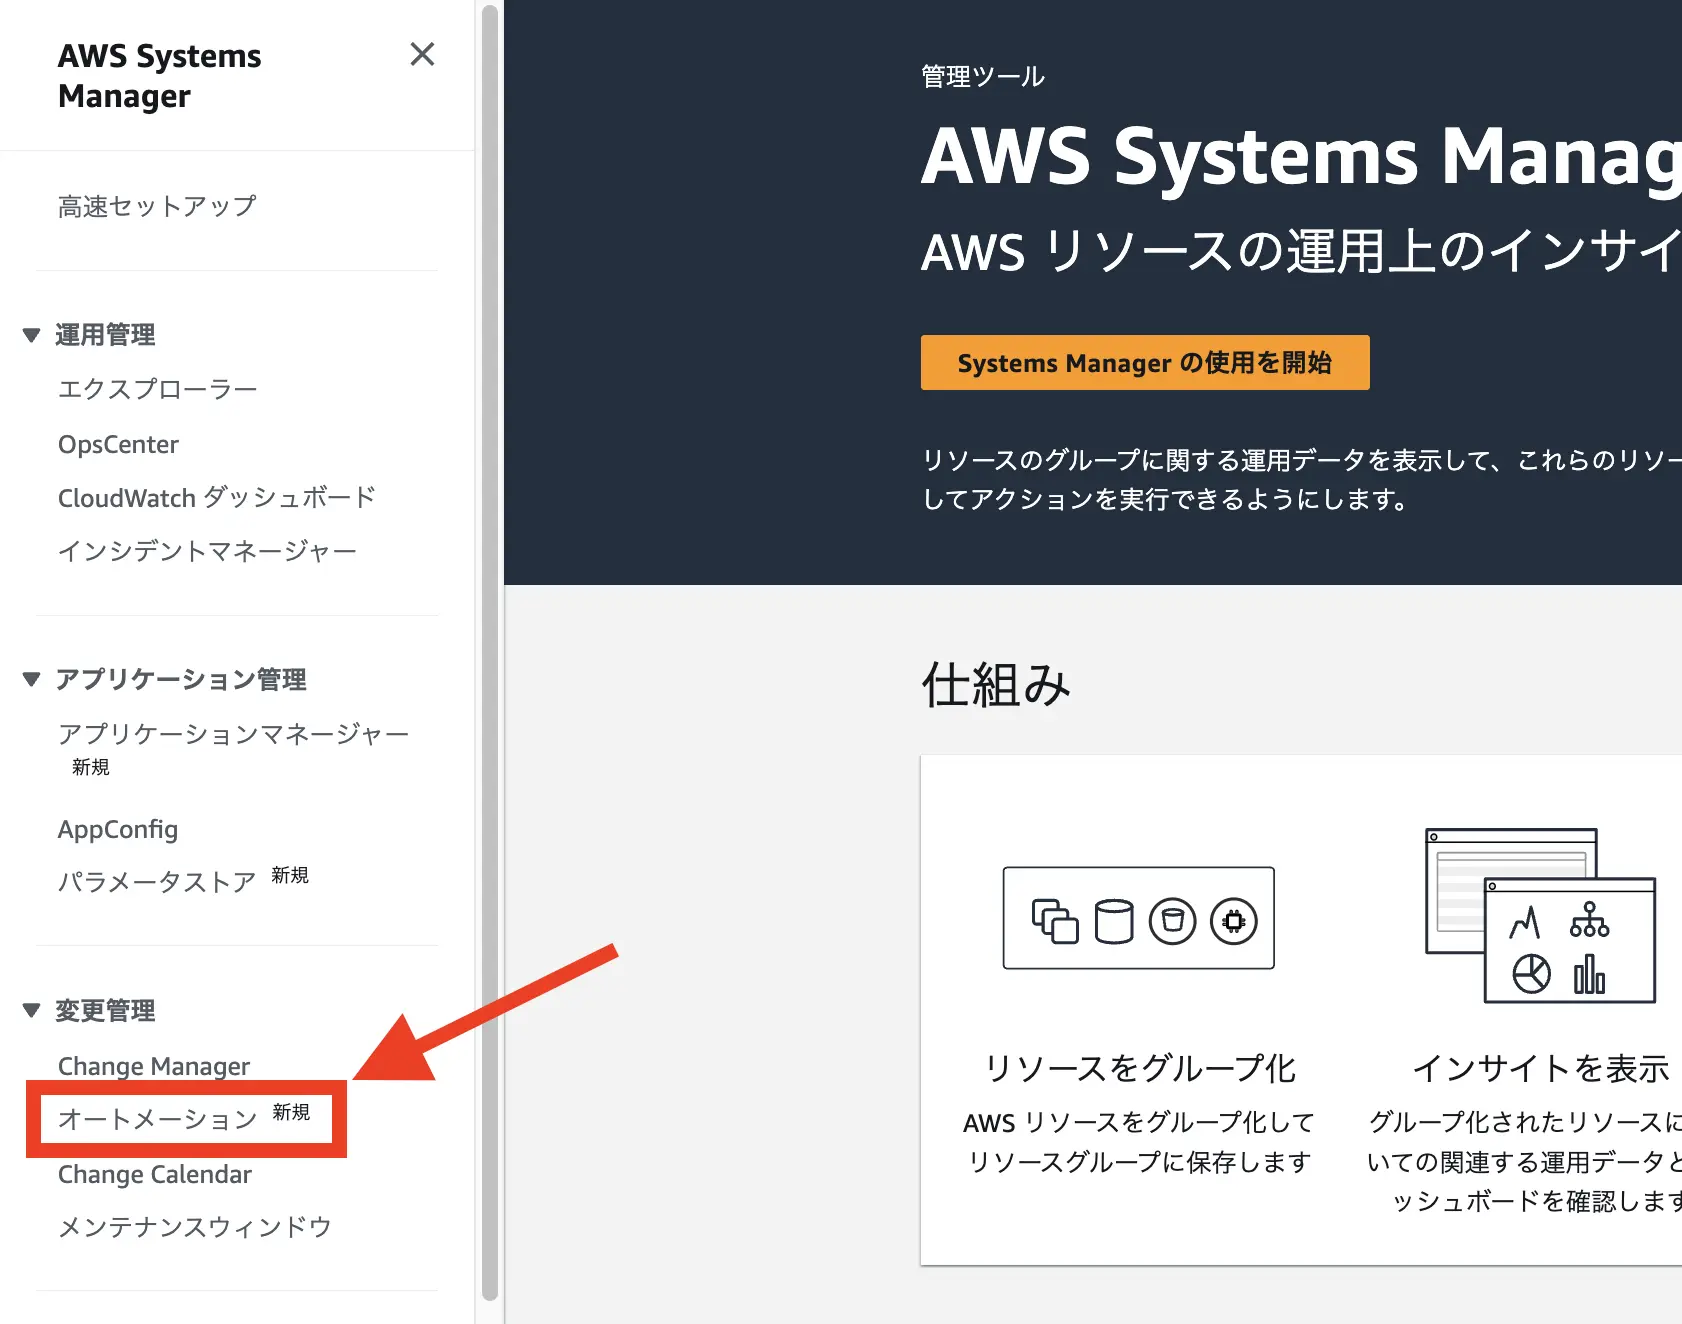
Execute automation ボタンを押します。

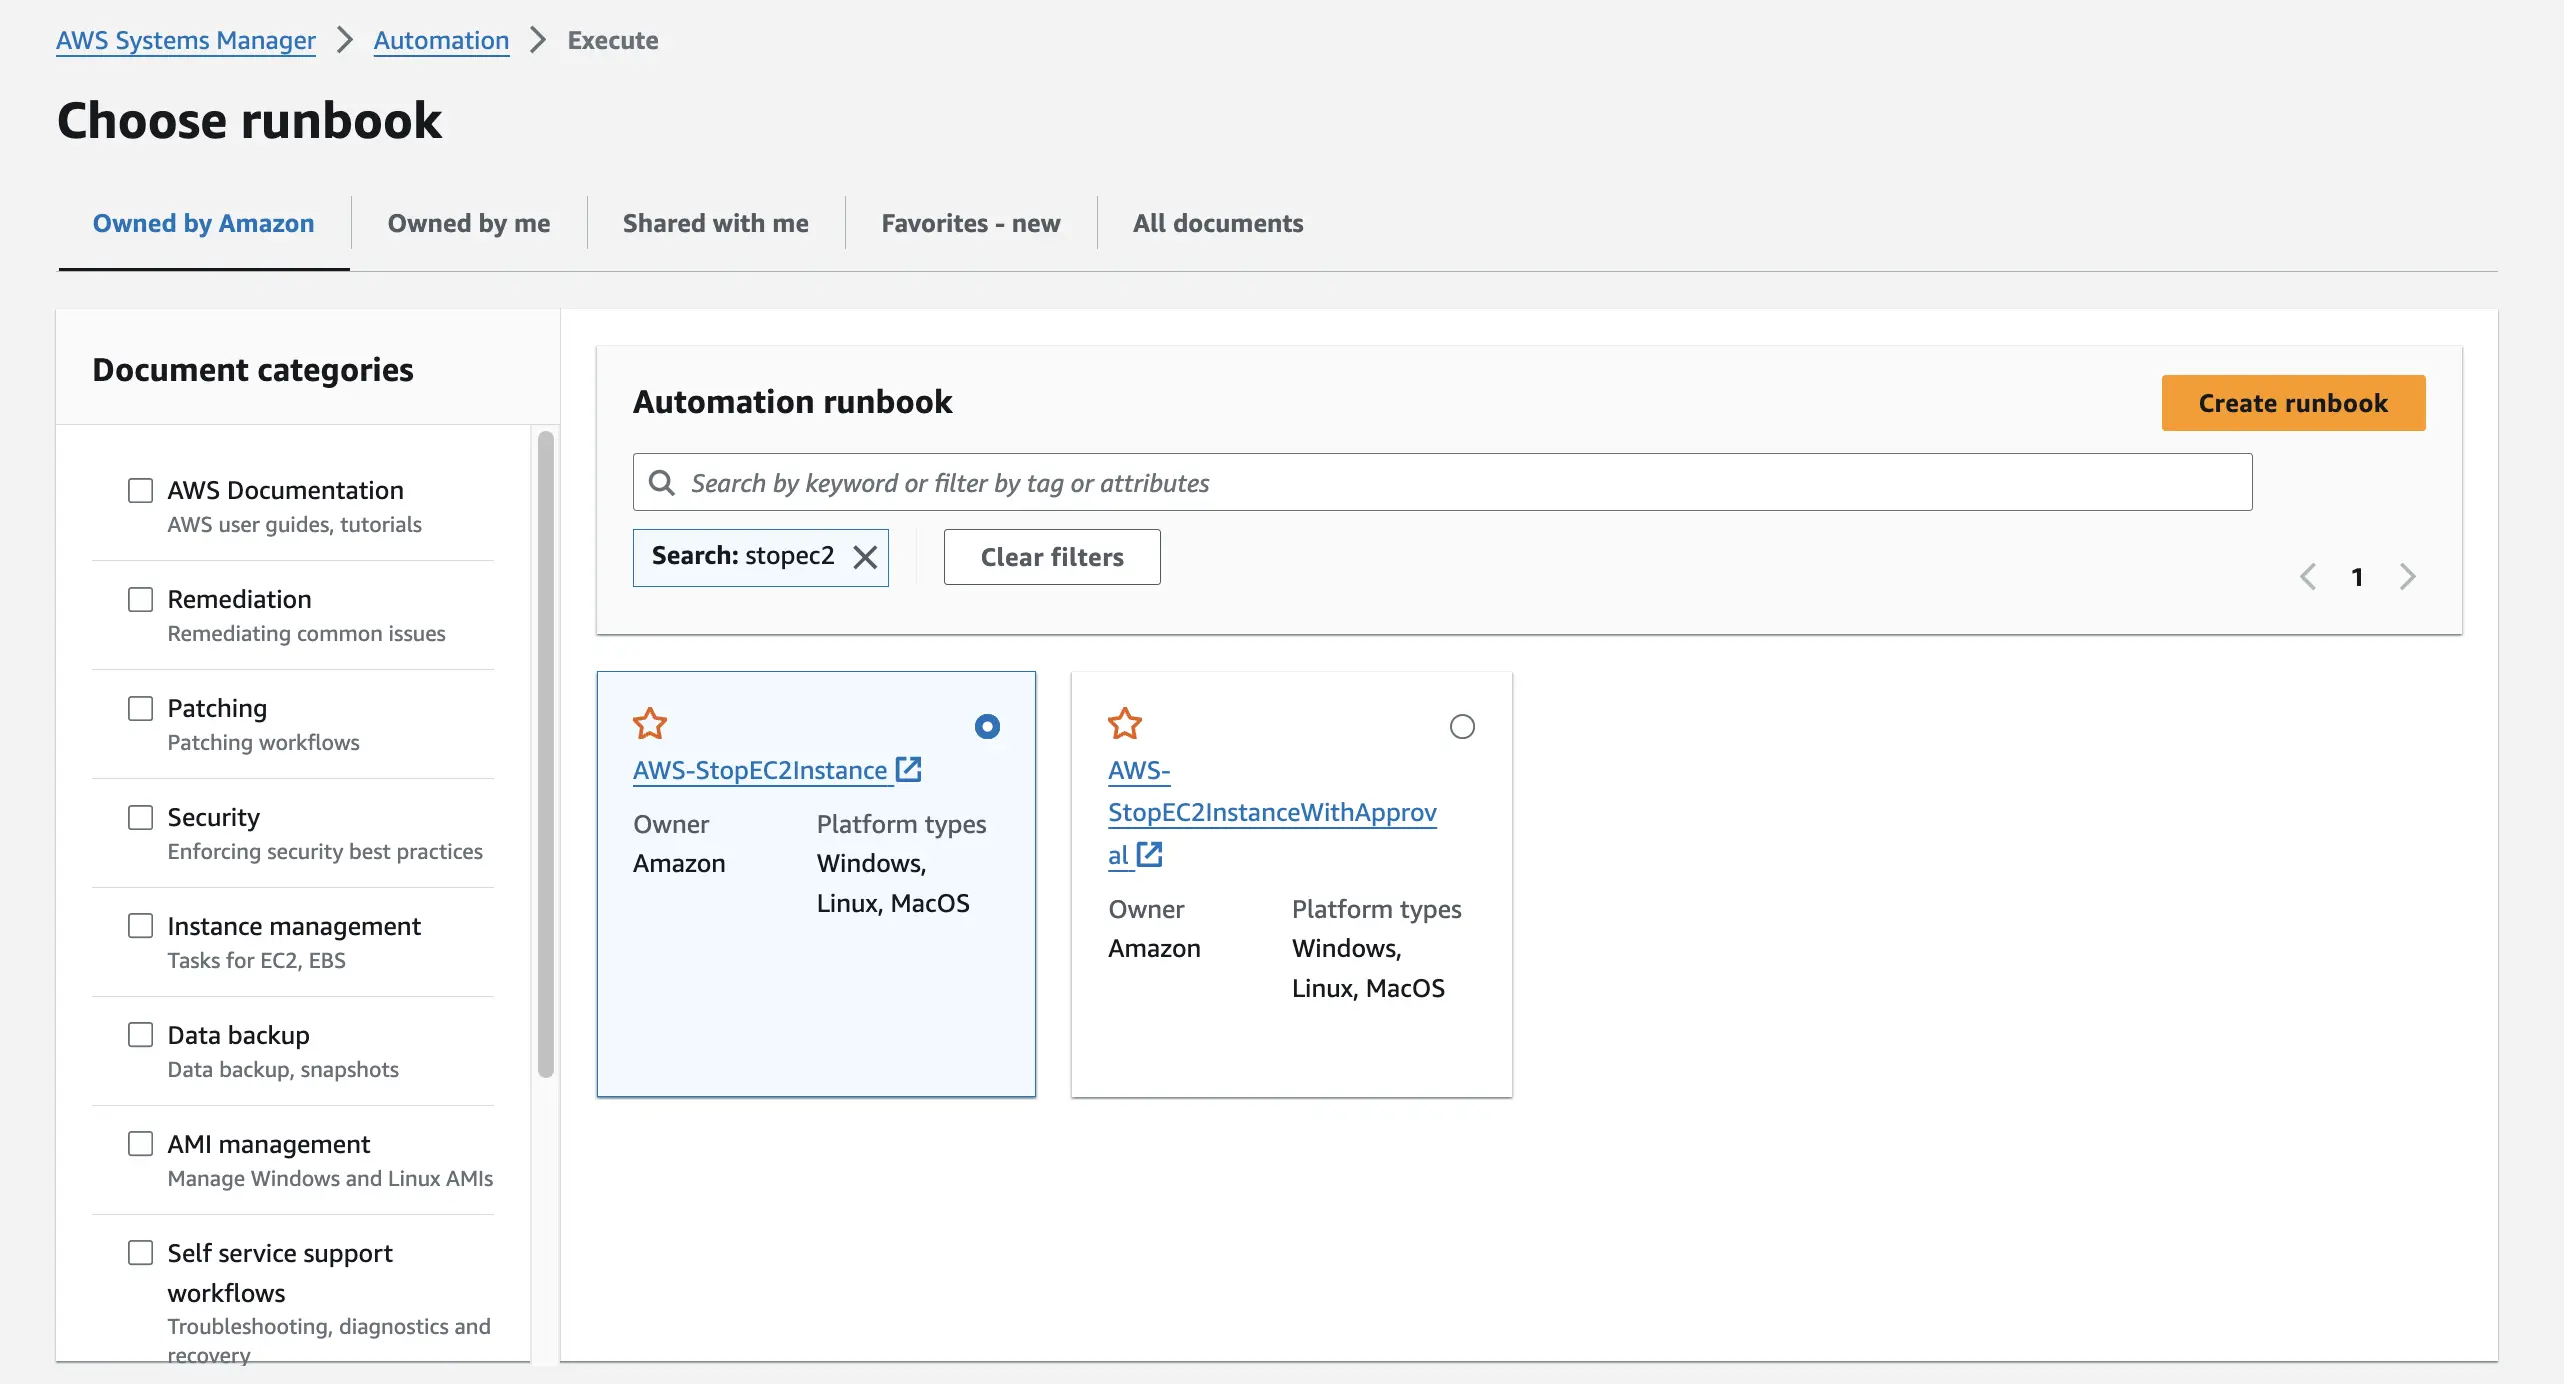
runbook を選択する画面が表示されるので、AWS-StopEC2Instance を選択します。ページ下部にある Next ボタンを押します。
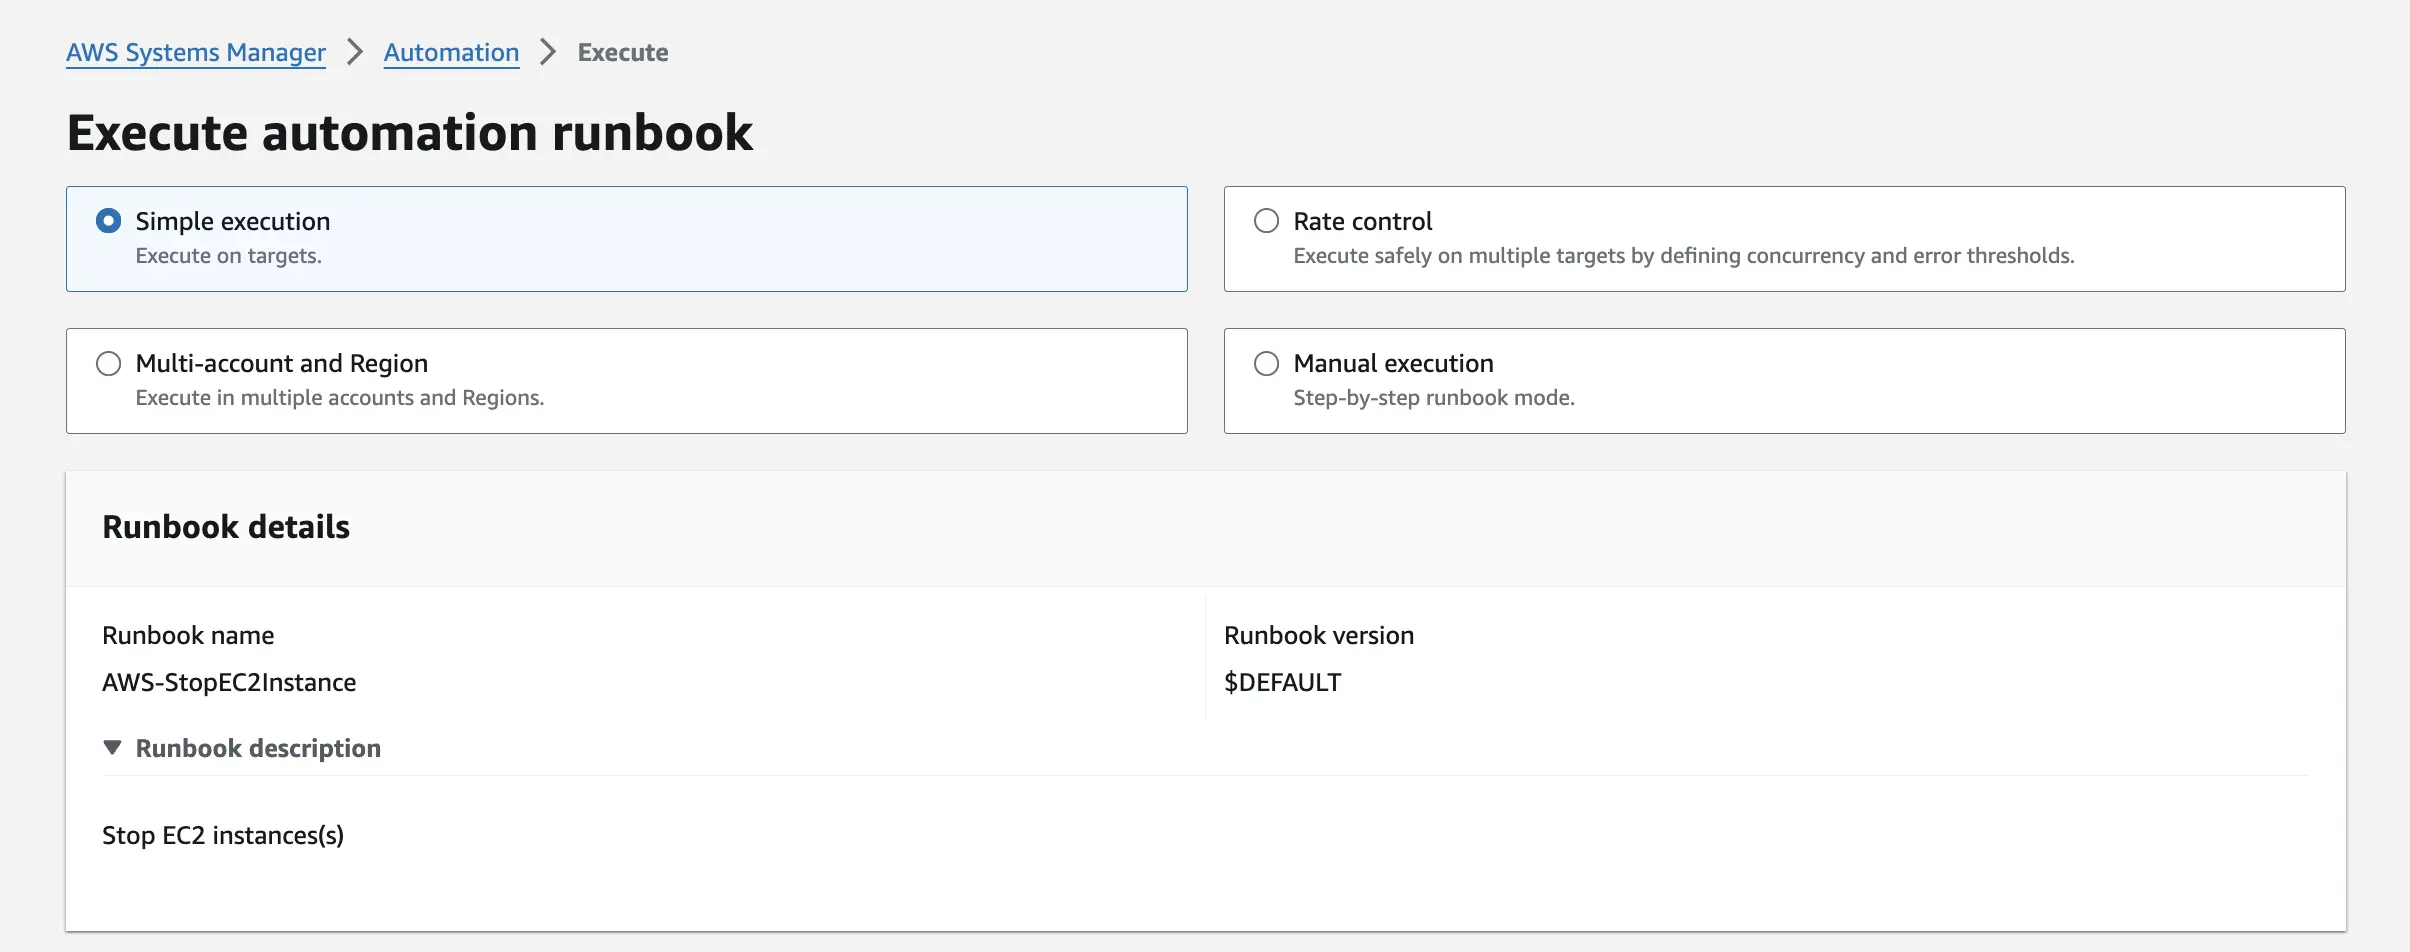
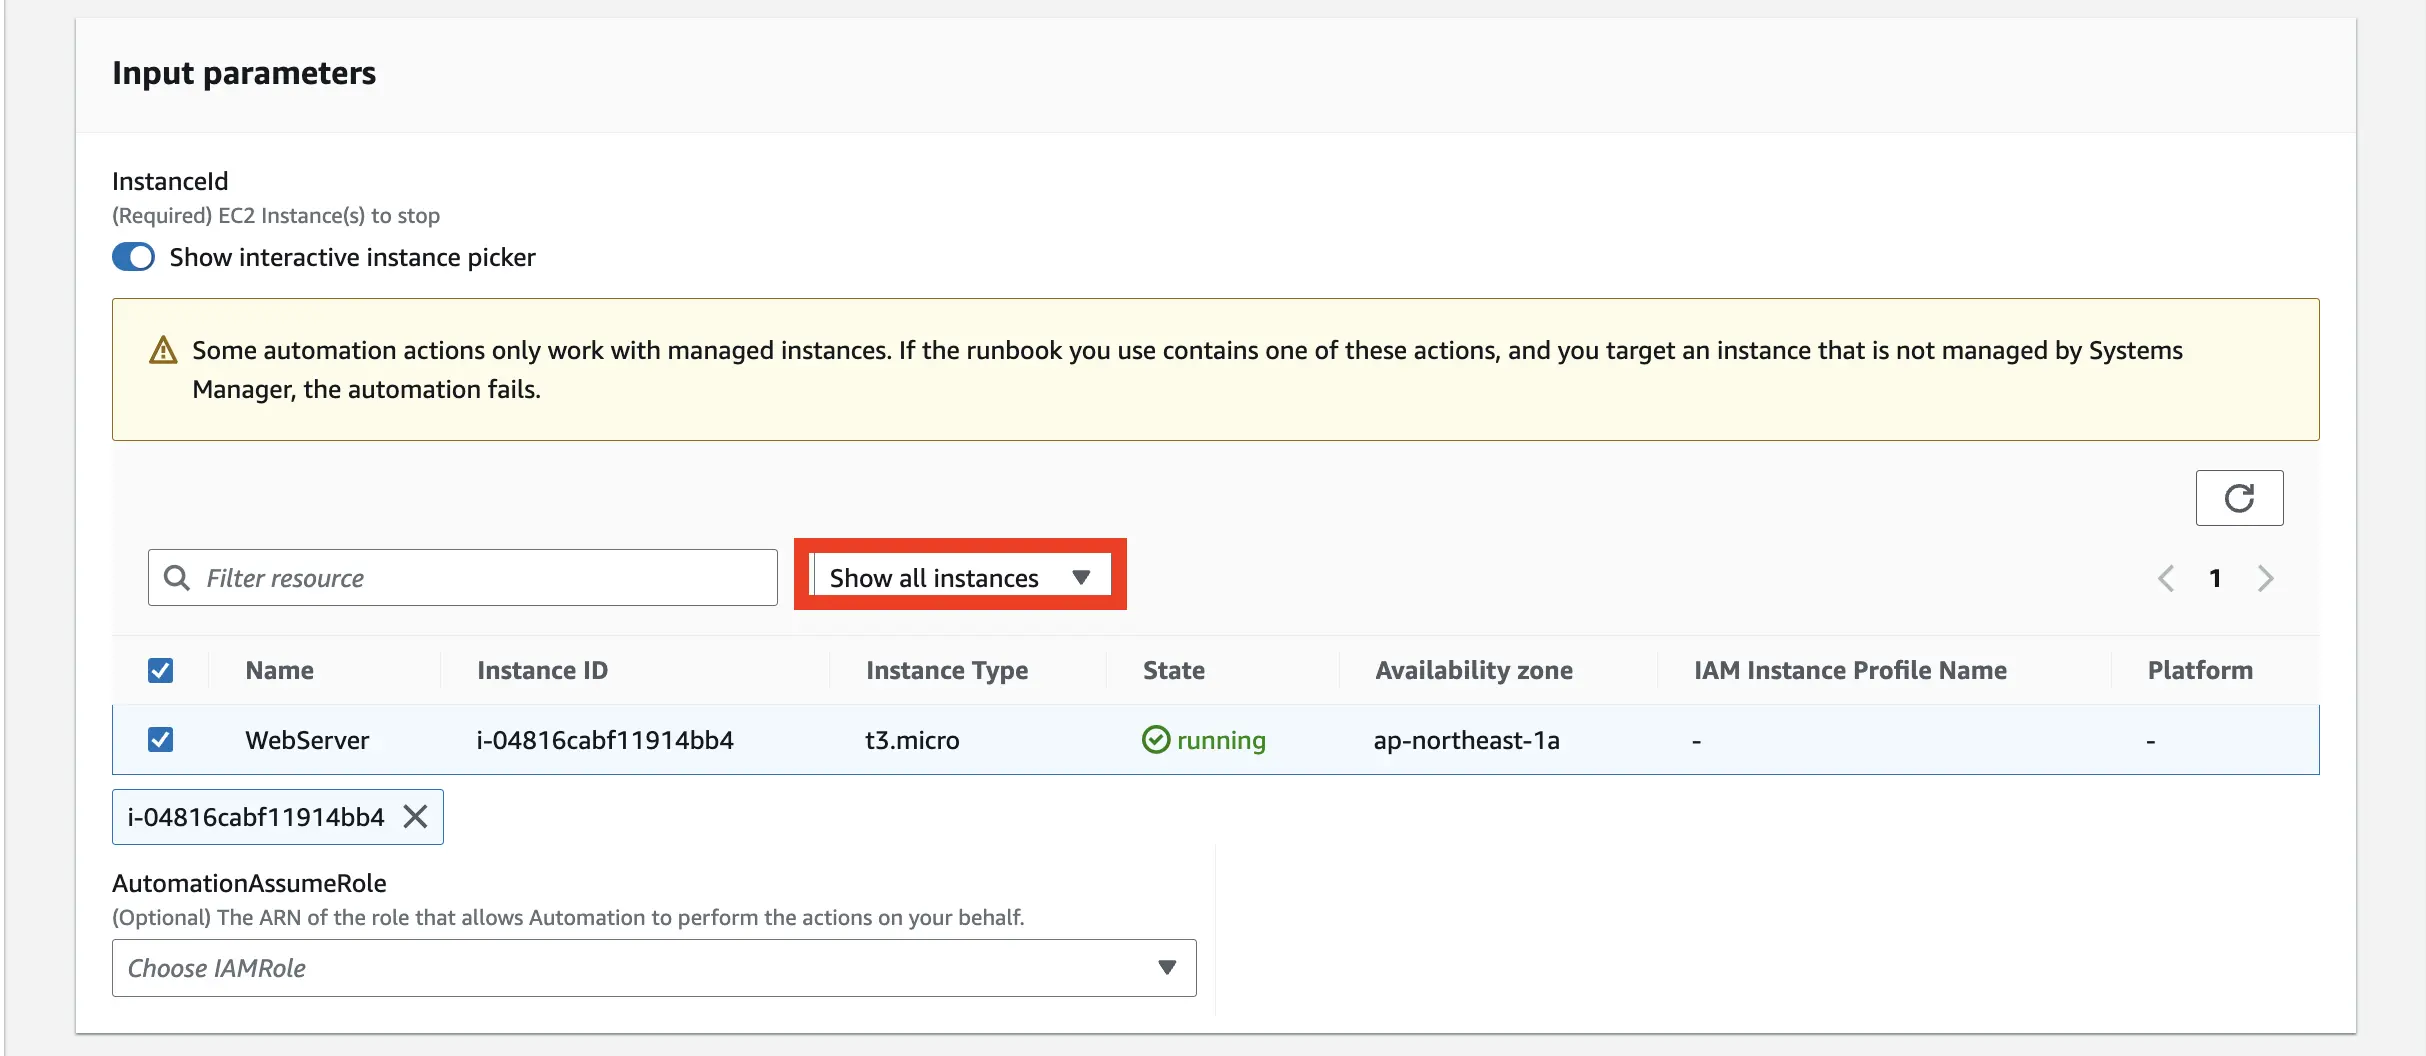
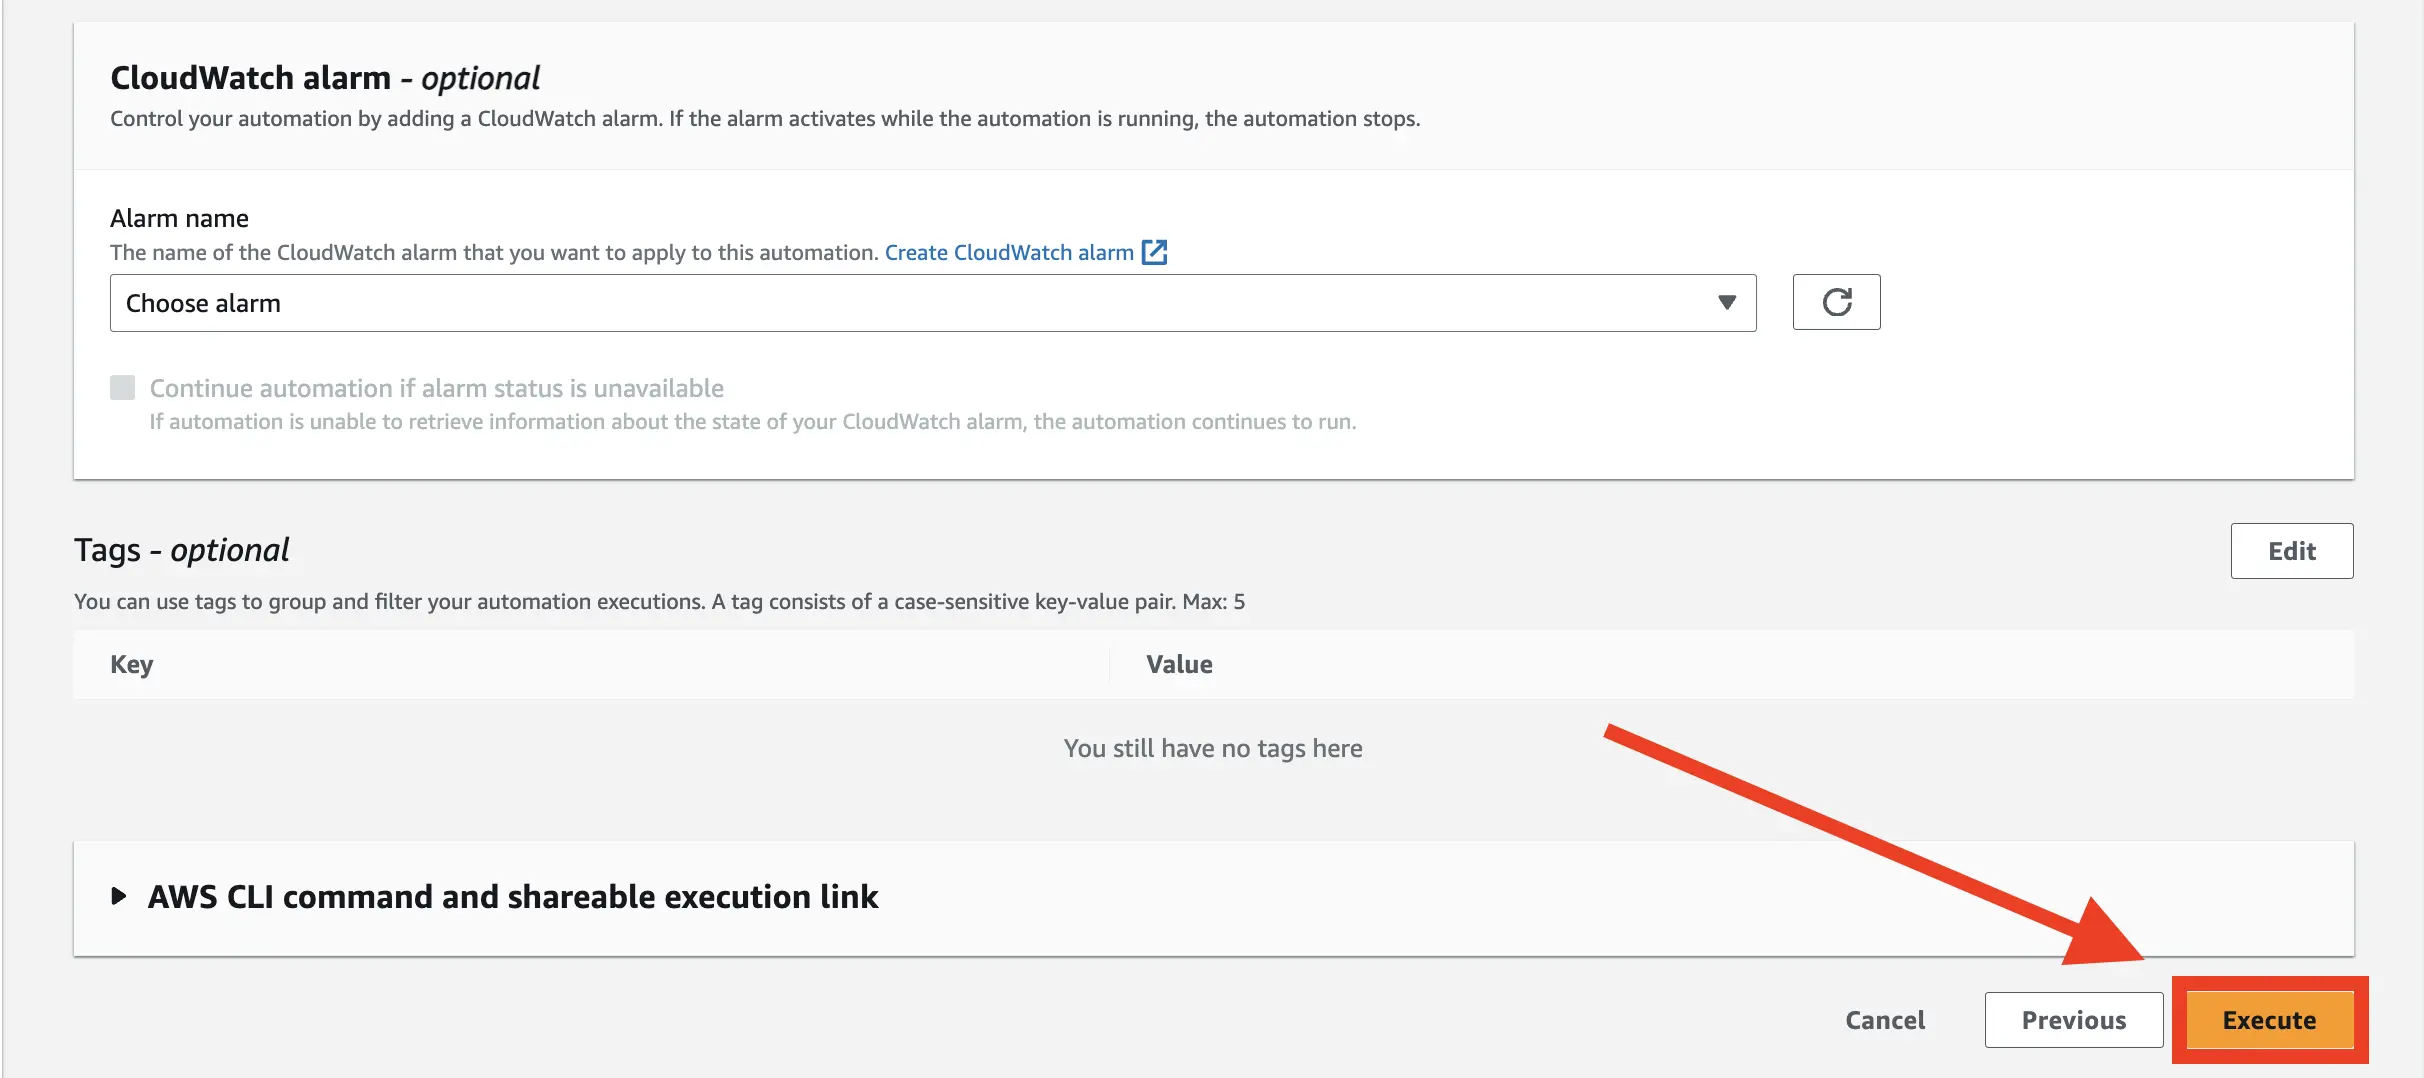
実際に Execute ボタンを押して runbook を実行してみます。設定は以下の画像のようにします。
runbook を実行すると以下のような画面になります。
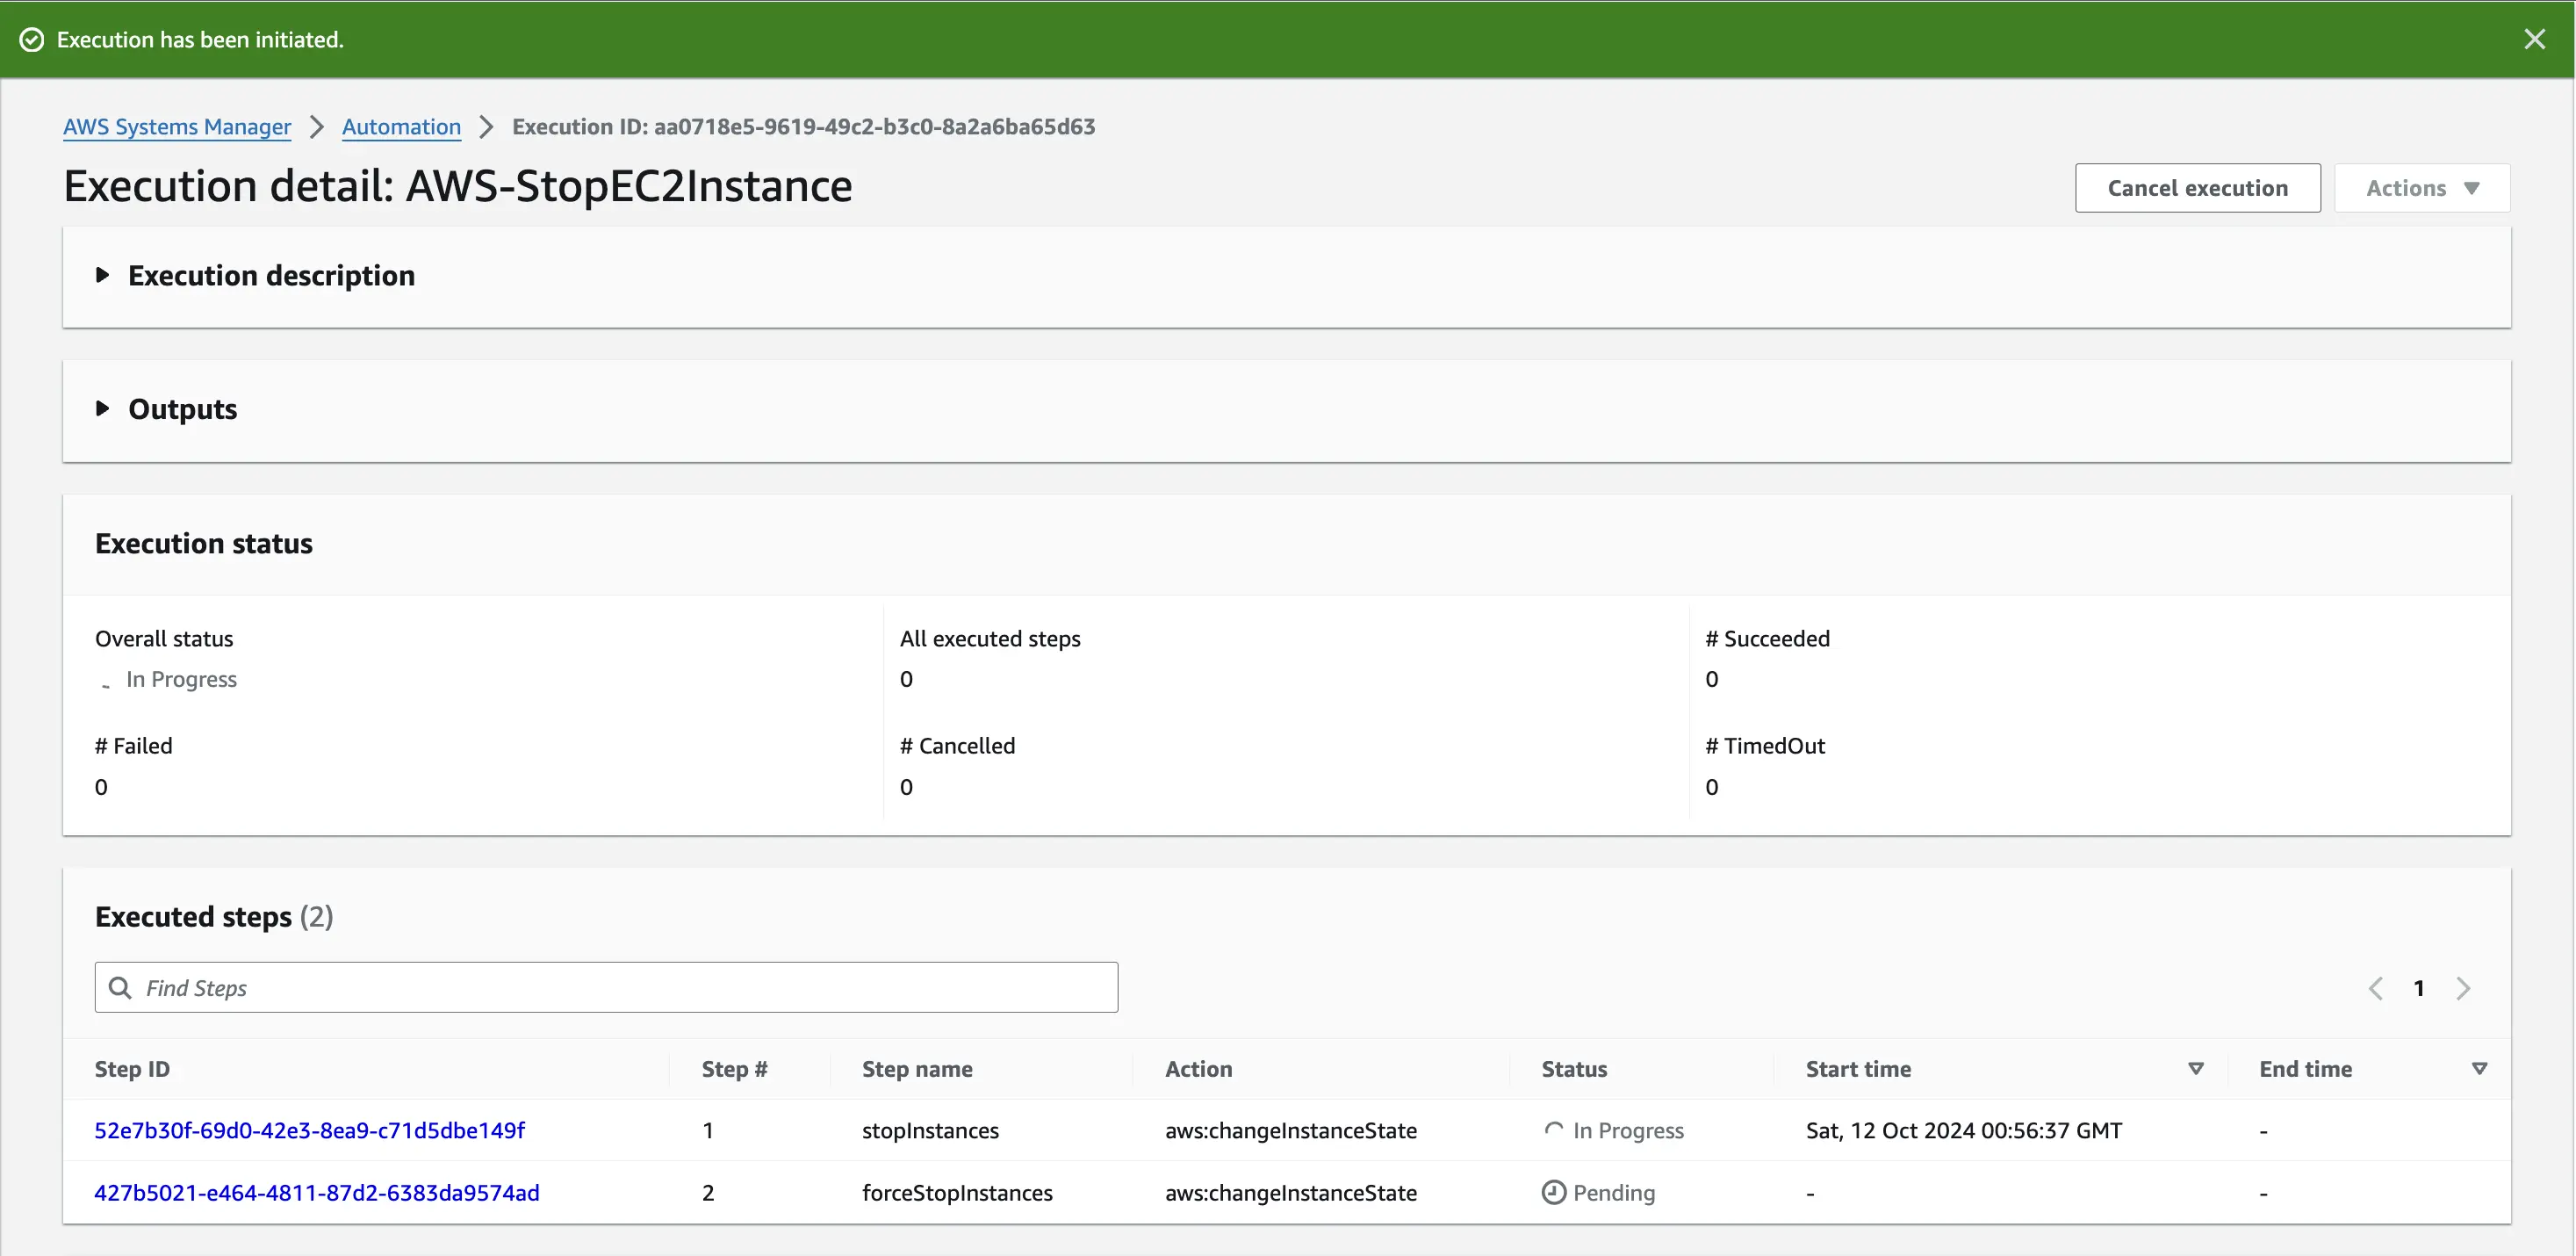
時間が経つと処理が完了するので、EC2 インスタンスを確認すると停止されていることがわかりました。

レート制御を使用して EC2 インスタンスを停止する
Section titled “レート制御を使用して EC2 インスタンスを停止する”タグを使った複数リソースに対して一括で処理を行う場合は、ターゲットとレート制御を使用します。
terrafrom で EC2 インスタンスを2つにします。
resource "aws_instance" "web" {  count = 2
  ami           = data.aws_ami.amazon_linux_2023.id  instance_type = "t3.micro"  subnet_id     = aws_subnet.public.id  vpc_security_group_ids = [aws_security_group.example.id]  associate_public_ip_address = true
  tags = {    Name = "WebServer"    Environment = "sandbox"  }}
先ほど同じく、 AWS-StopEC2Instance を選択し、Next ボタンを押します。

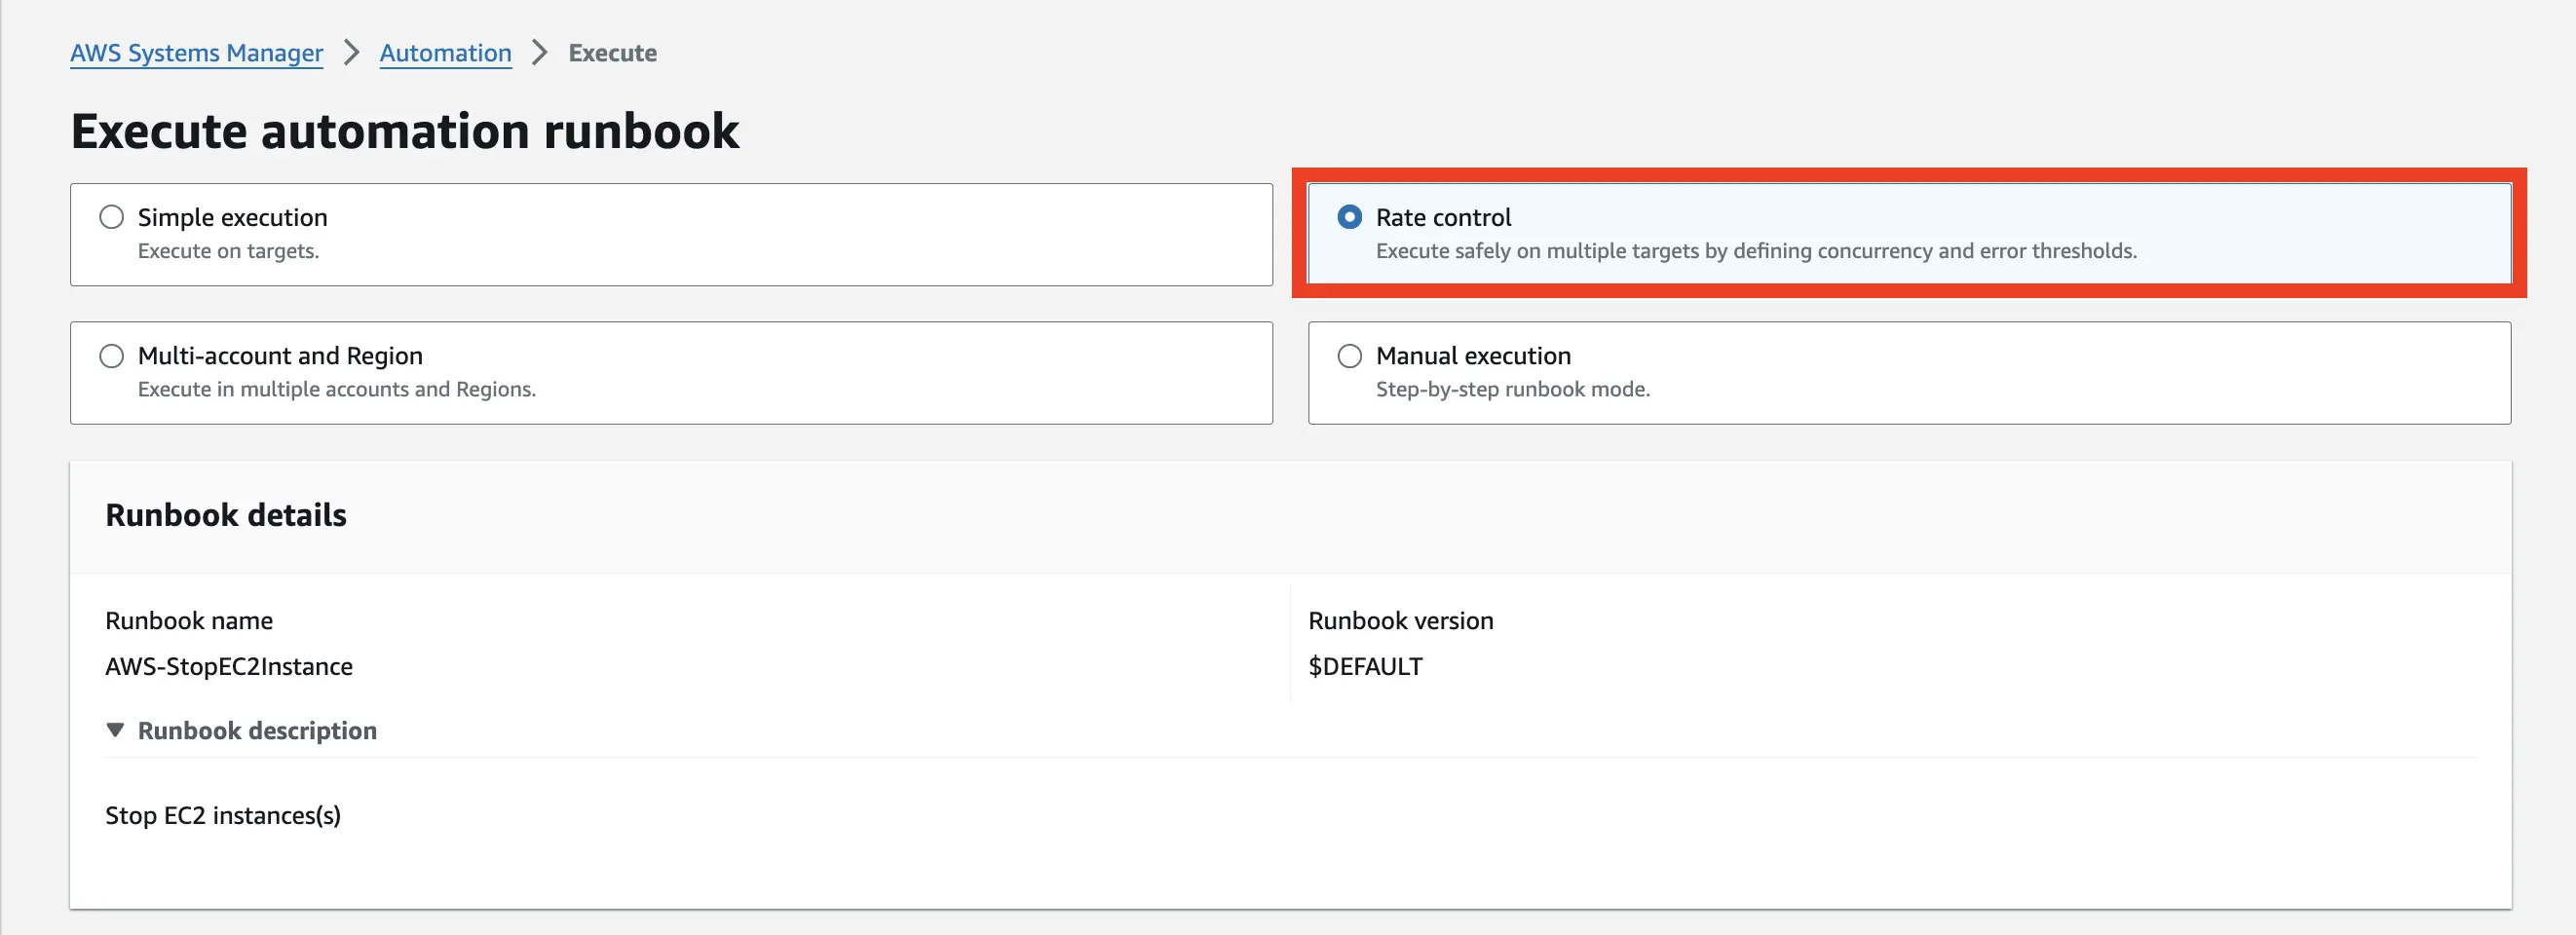
先ほどと違い今度は Rate control を選択します。
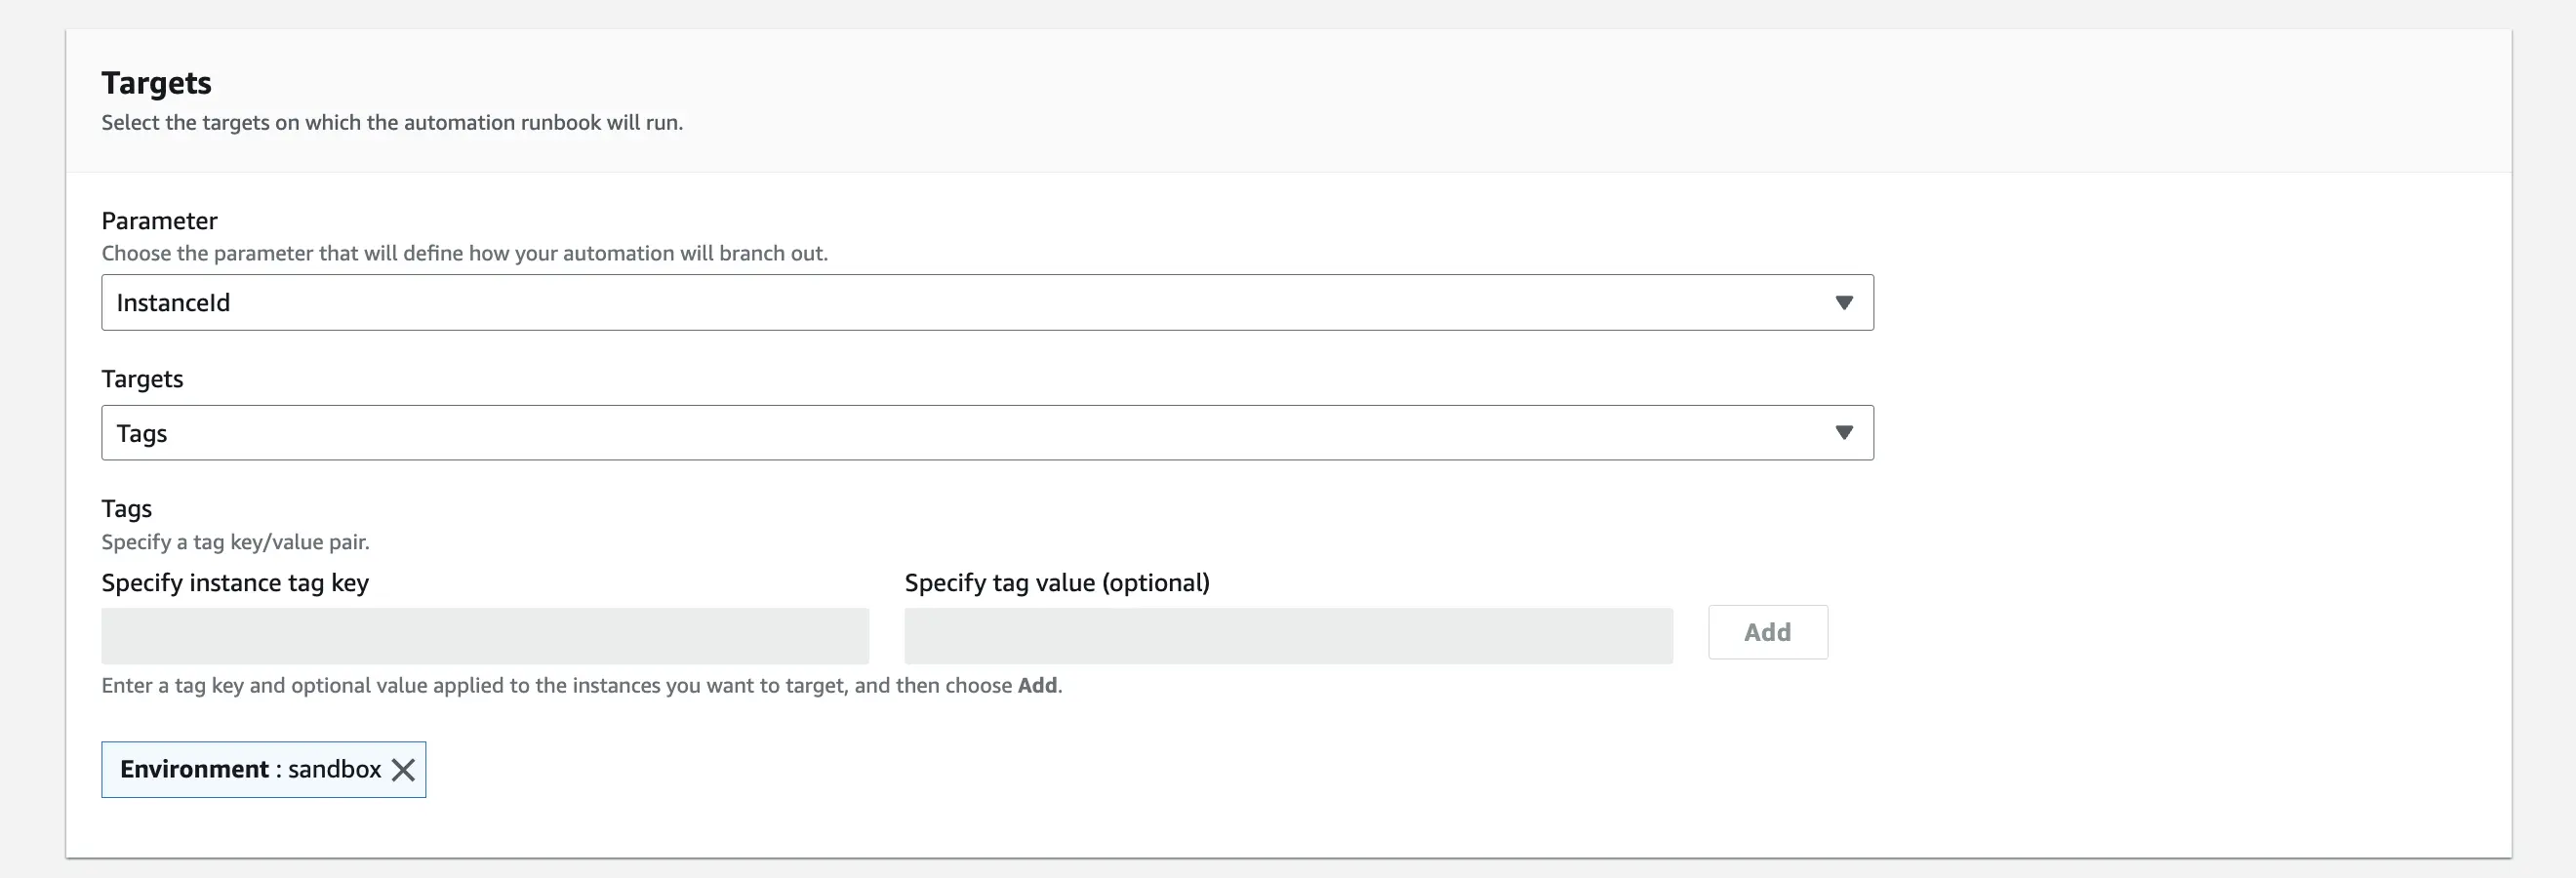
設定は以下の画像のようにし、実際に Execute ボタンを押して runbook を実行してみます。
Targets に Tags を選択し、Key に Environment、Value に sandbox を入力します。
Rate control は Concurrency を 1 に設定します。

runbook を実行すると以下のような画面になります。Concurrecy を 1 に設定したため、1つのインスタンスが停止されると次のインスタンスが停止されるようになります。
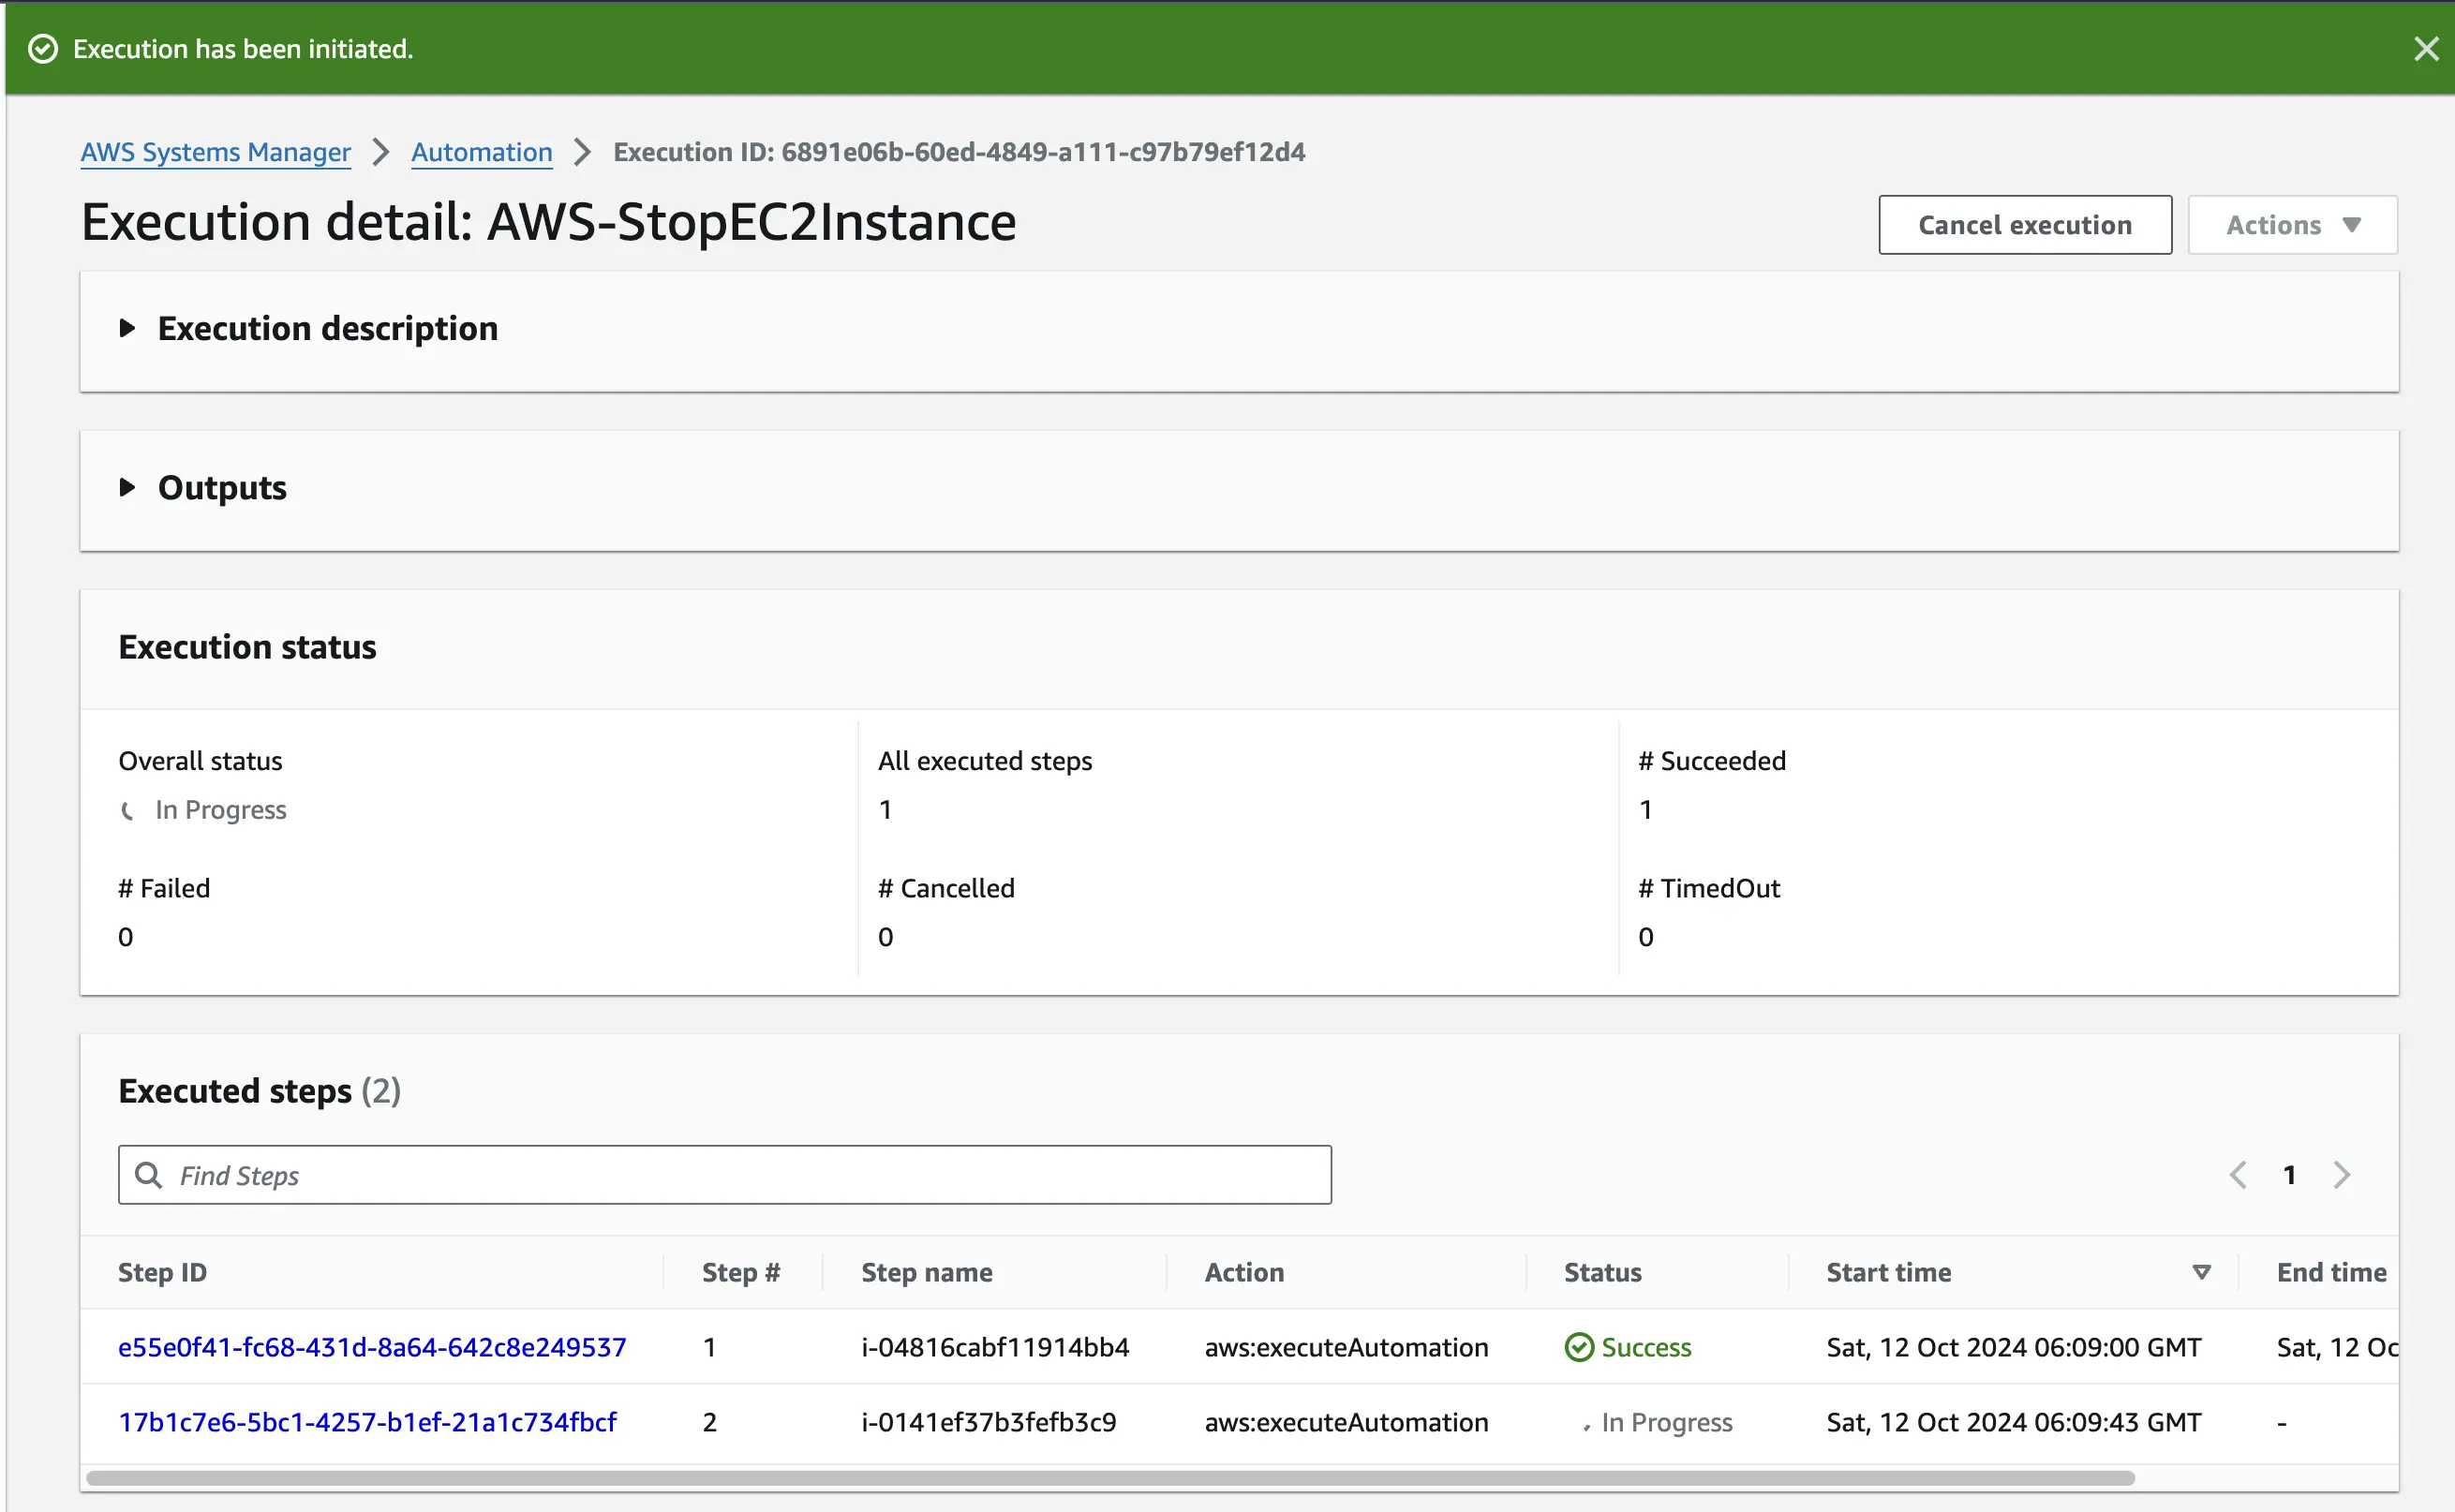
時間が経つと処理が完了するので、EC2 インスタンスを確認すると停止されていることがわかりました。

独自のランブックを作成する
Section titled “独自のランブックを作成する”ランブックでサポートされているアクションタイプを使用すると、独自のランブックを作成できます。
Systems Manager Automation アクションのリファレンスを参考に、独自のランブックを作成してみます。
CloudWatch logs にログを出力する
Section titled “CloudWatch logs にログを出力する”独自のランブックを作成しますが、aws:executeScript アクションタイプ を使用するため、ログを出力するための設定を行います。
Automations のページから Preferences を選択します。Edit ボタンを押し、Send output to CloudWatch Logs にチェックを入れます。今回はデフォルトのロググループにします。
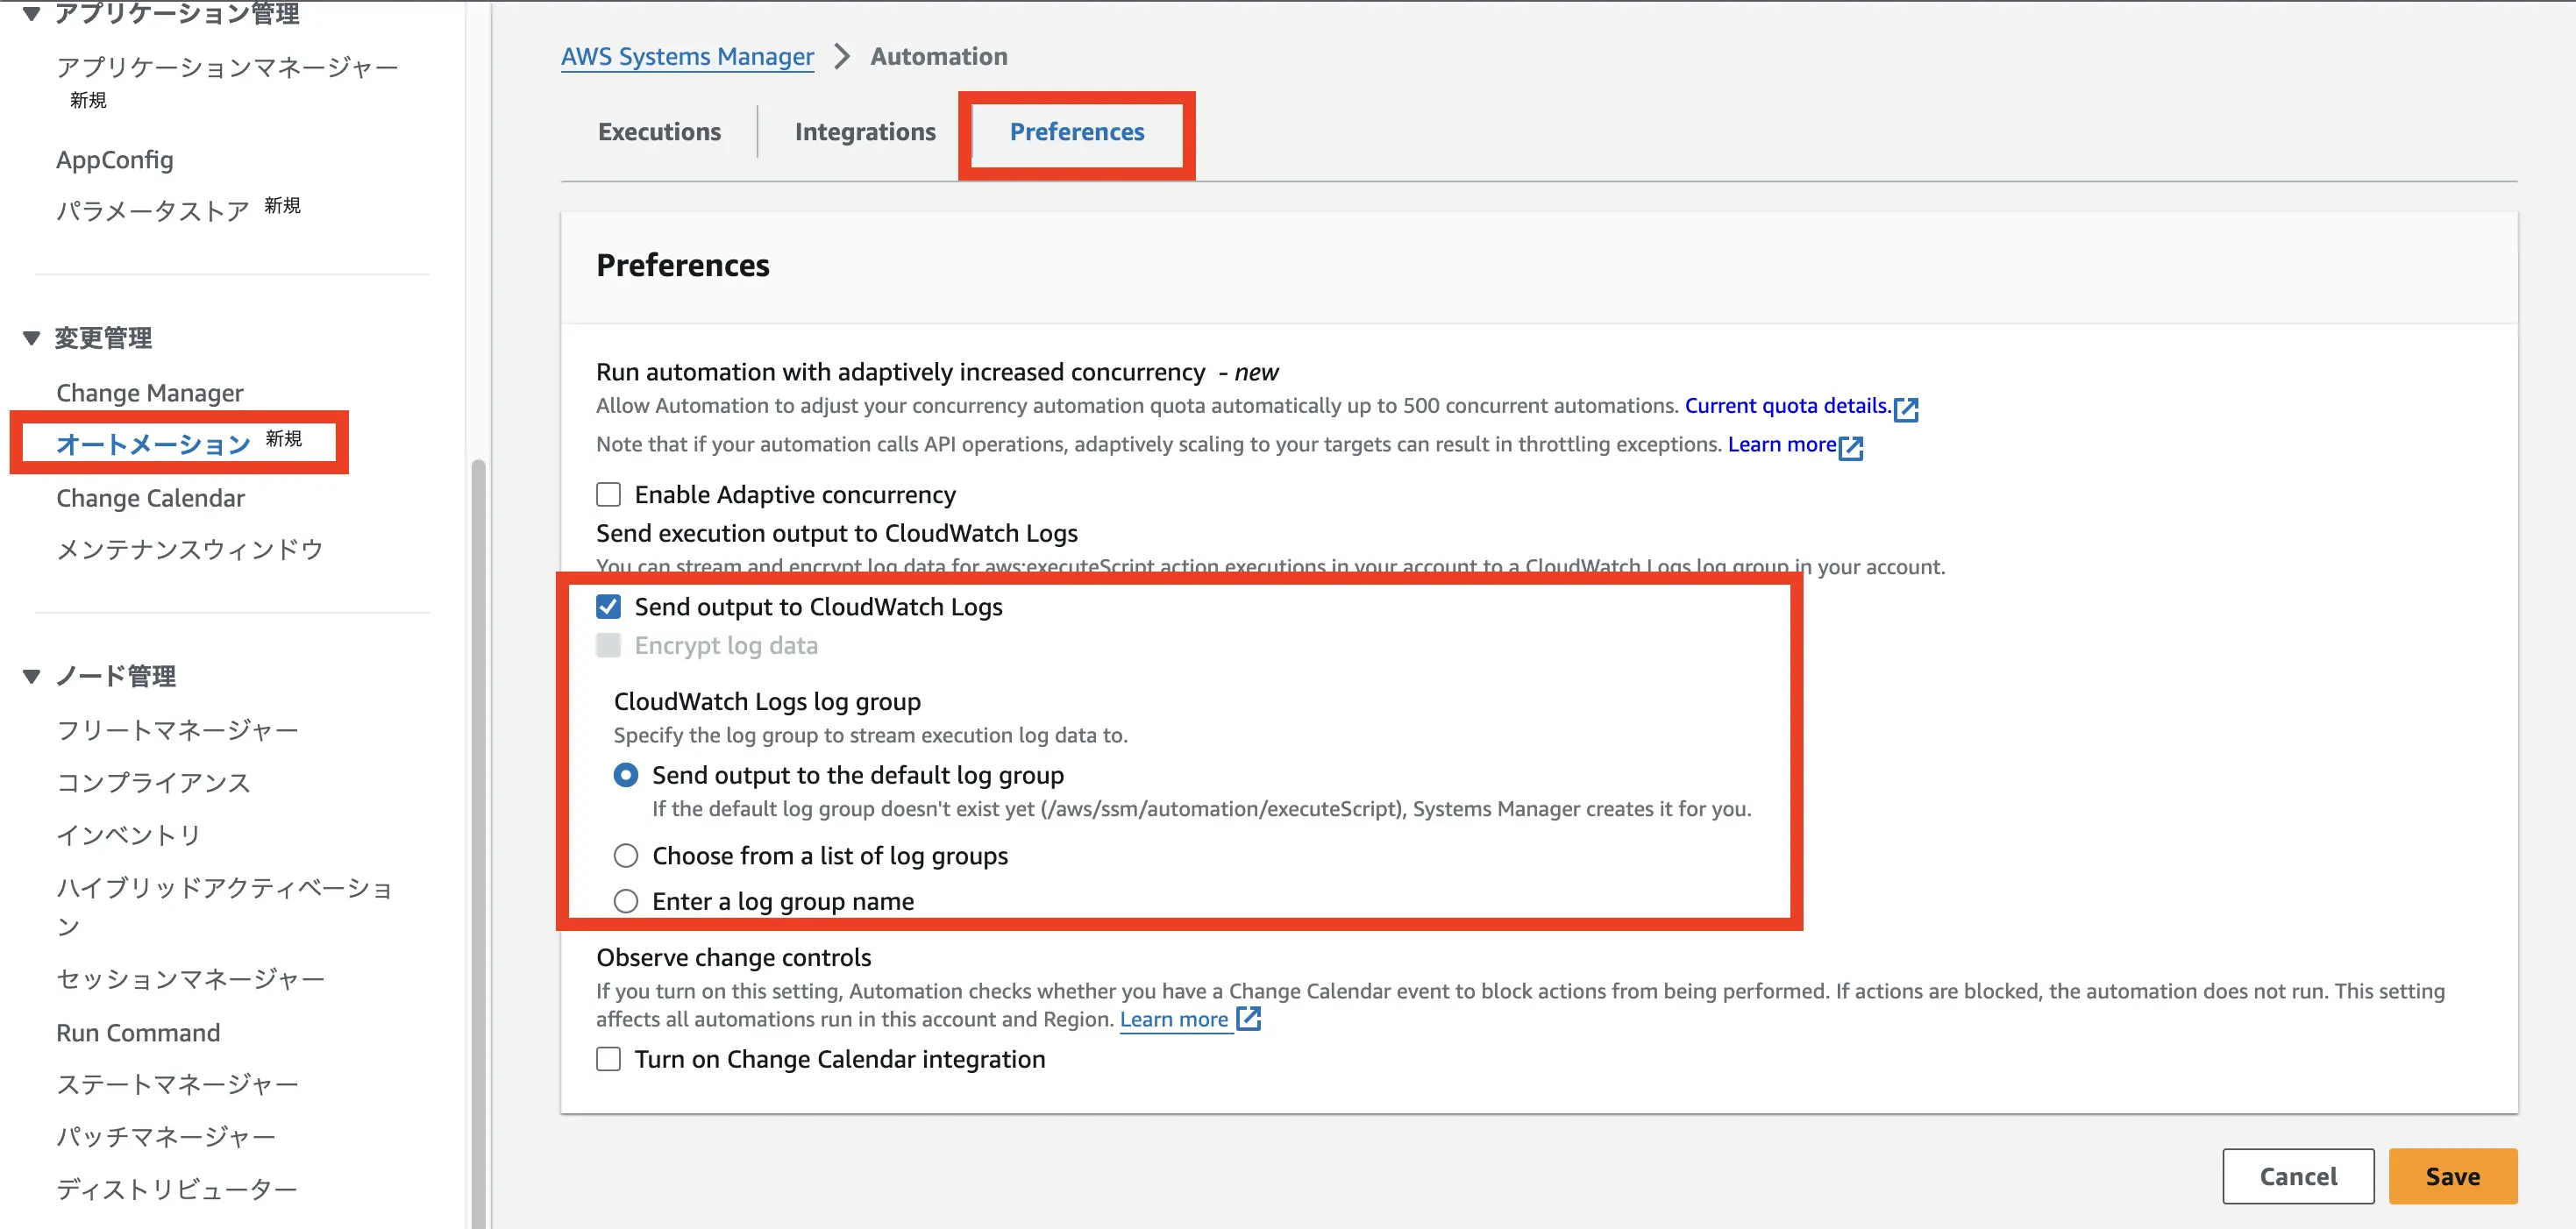
参考:CloudWatch Logs を使用した自動アクション出力のログ記録 - AWS Documentation
ロールを作成する
Section titled “ロールを作成する”ランブックを実行する際に Assume Role をするためのロールを作成します。
data "aws_caller_identity" "current" {}
data "aws_iam_policy_document" "instance_assume_role_policy" {  statement {    actions = ["sts:AssumeRole"]
    principals {      type        = "Service"      identifiers = ["ssm.amazonaws.com"]    }
    condition {      test     = "StringEquals"      variable = "aws:SourceAccount"      values   = [data.aws_caller_identity.current.account_id]    }
    condition {      test     = "ArnLike"      variable = "aws:SourceArn"      values   = ["arn:aws:ssm:*:${data.aws_caller_identity.current.account_id}:automation-execution/*"]    }  }}
resource "aws_iam_role" "system_manager_automation" {  name               = "system-manager-automation-role"  path               = "/"  assume_role_policy = data.aws_iam_policy_document.instance_assume_role_policy.json}
resource "aws_iam_role_policy" "system_manager_automation" {  name = "automation-policy"  role = aws_iam_role.system_manager_automation.id
  policy = jsonencode({    Version = "2012-10-17"    Statement = [      {        Action = [          "ec2:Describe*",        ]        Effect   = "Allow"        Resource = "*"      },      {        Action = [          "logs:CreateLogGroup",          "logs:CreateLogStream",          "logs:DescribeLogGroups",          "logs:DescribeLogStreams",          "logs:PutLogEvents",        ]        Effect   = "Allow"        Resource = "*"      },    ]  })}
参考:
- CloudWatch Logs を使用した自動アクション出力のログ記録 - AWS Documentation
- AWS Systems Manager と IAM の連携方法 - AWS Documentation
- ランブックを使用するためのアクセス許可
ビジュアルデザインエクスペリエンスを使用する
Section titled “ビジュアルデザインエクスペリエンスを使用する”AWS Systems Manager Automation のページから Create automation ボタンを押します。

ビジュアルデザインエクスペリエンスのページ上部でランブックの名前を編集できます。今回は ExampleAutomation とします。
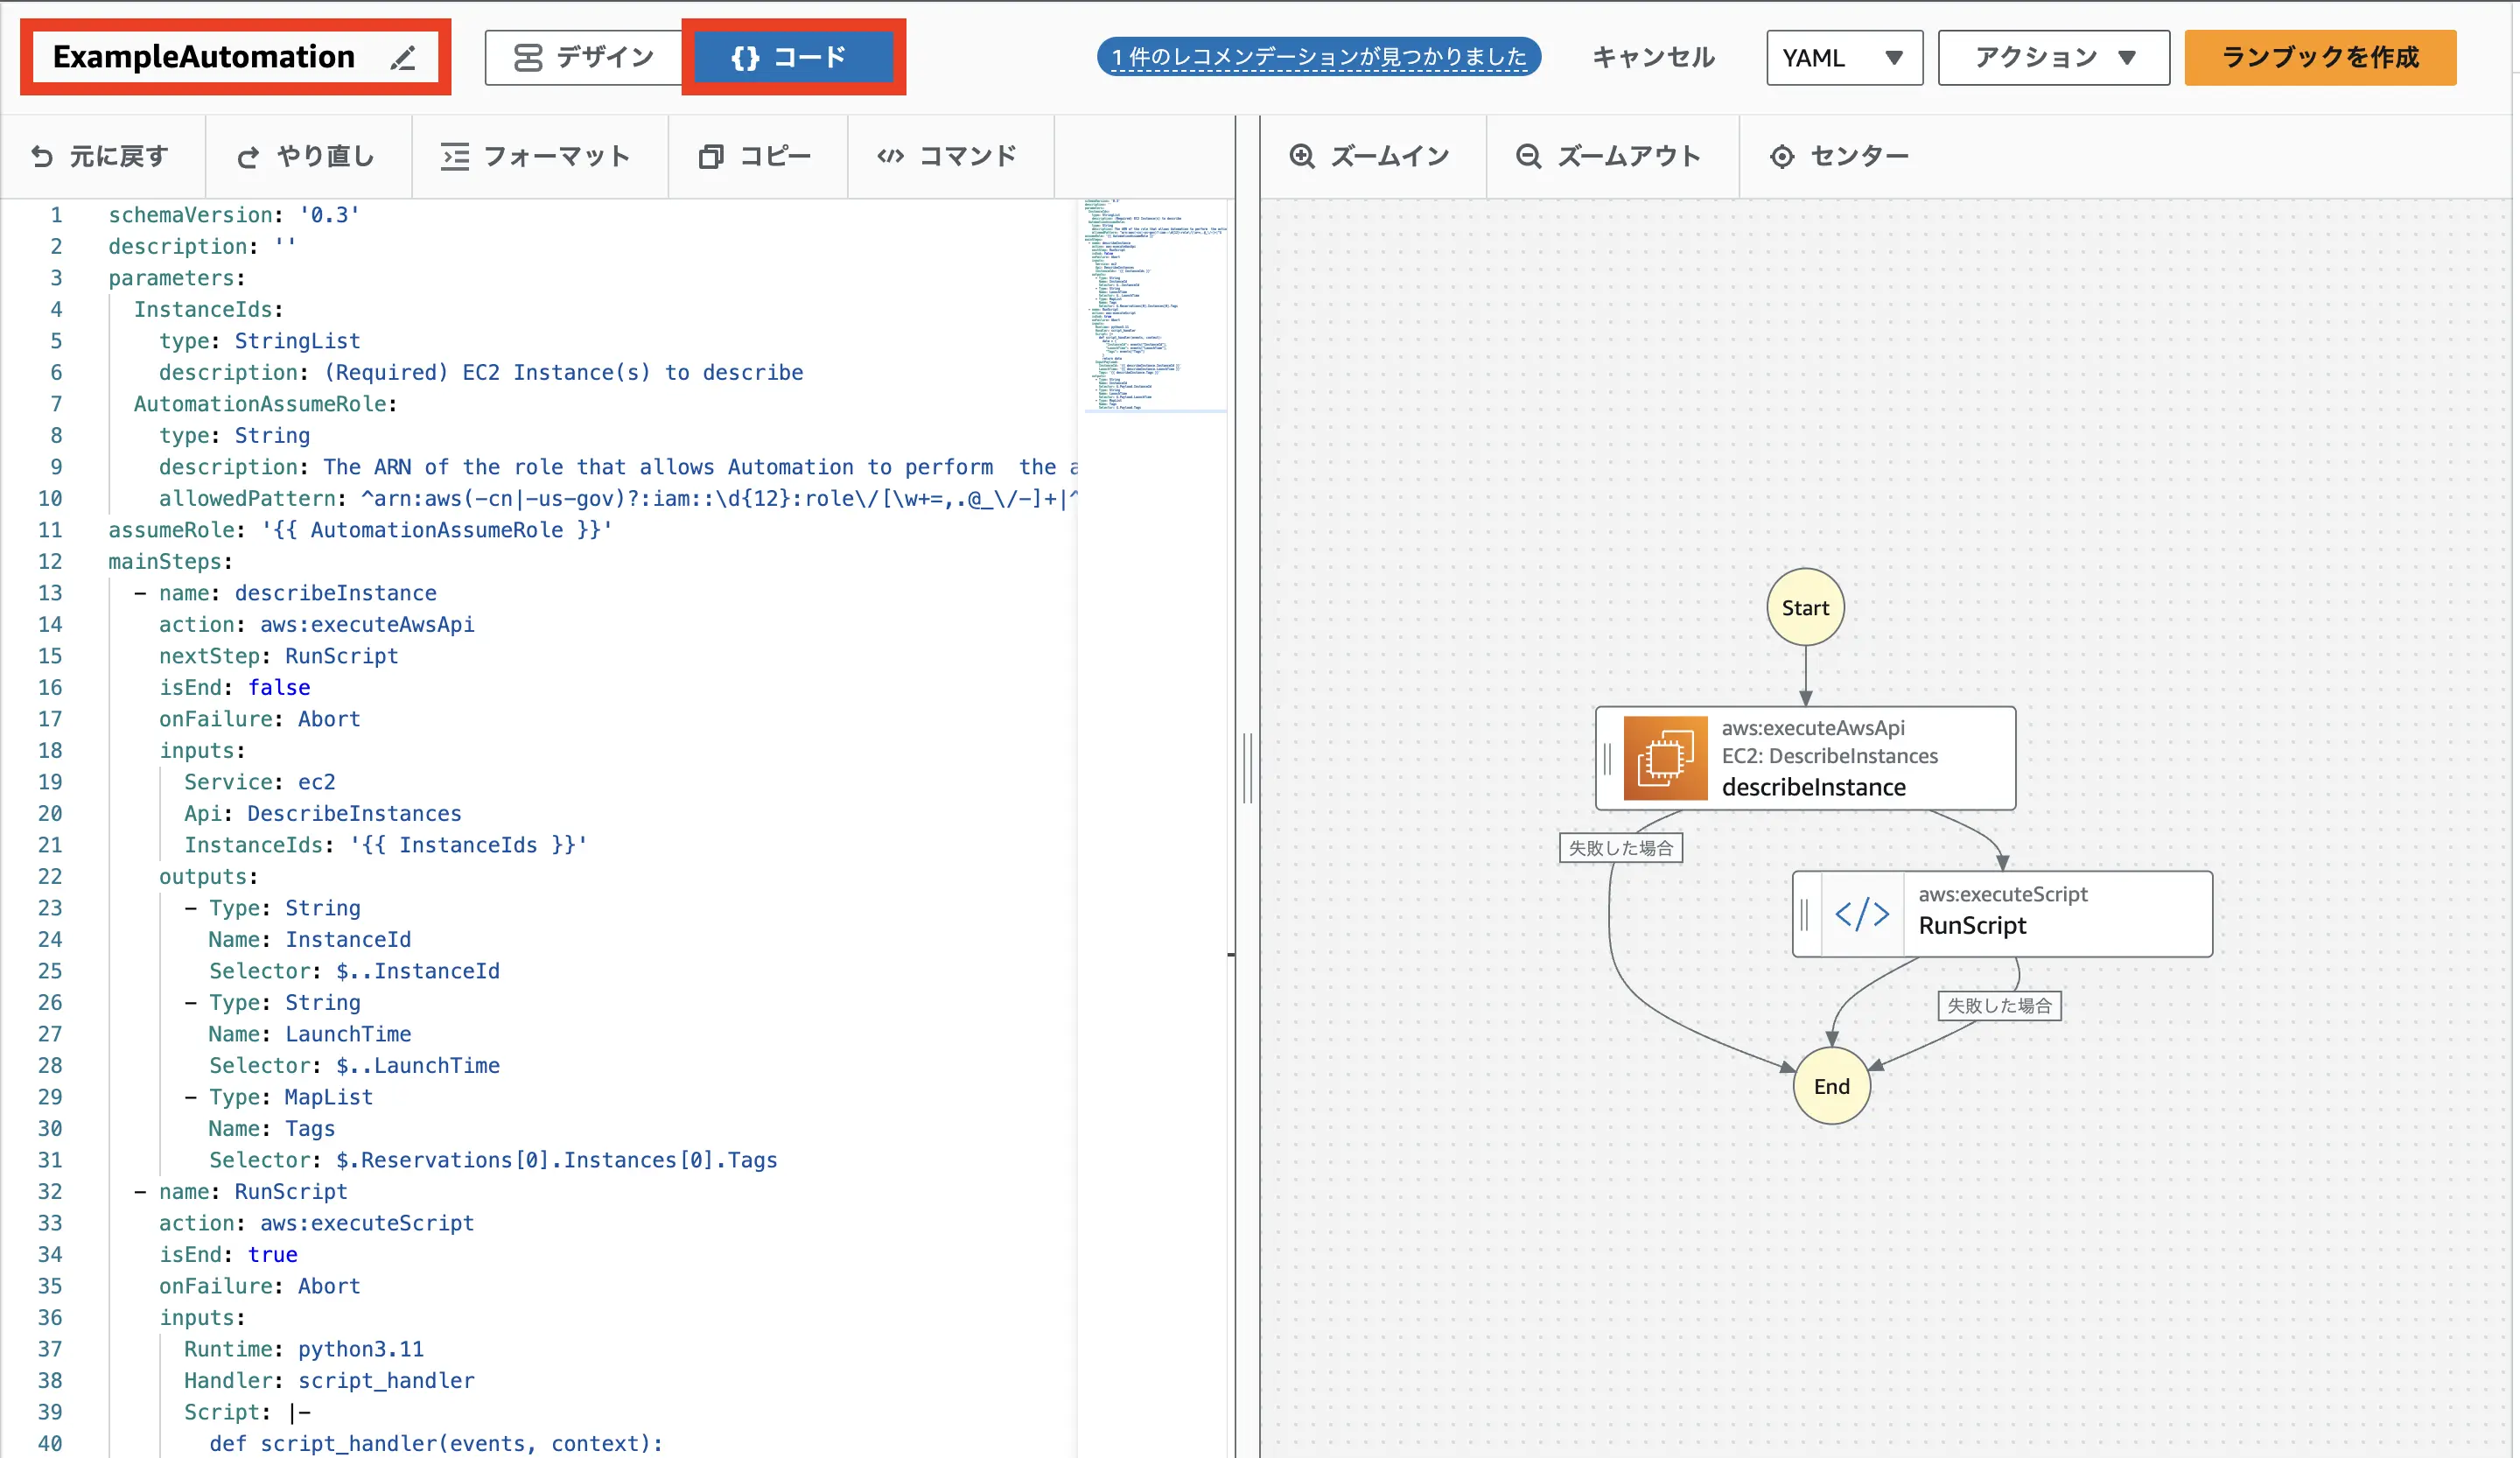
{} コード を選択し、以下のコードを貼り付けます。やっていることは単純で、aws:executeAwsApi で DescribeInstances を実行し、その結果を aws:executeScript で受け取るだけです。
schemaVersion: '0.3'description: ''parameters: InstanceIds: type: StringList description: (Required) EC2 Instance(s) to describe AutomationAssumeRole: type: String description: The ARN of the role that allows Automation to perform the actions on your behalf. If no role is specified, Systems Manager Automation uses your IAM permissions to run this runbook. allowedPattern: ^arn:aws(-cn|-us-gov)?:iam::\d{12}:role\/[\w+=,.@_\/-]+|^$assumeRole: '{{ AutomationAssumeRole }}'mainSteps: - name: describeInstance action: aws:executeAwsApi nextStep: RunScript isEnd: false onFailure: Abort inputs: Service: ec2 Api: DescribeInstances InstanceIds: '{{ InstanceIds }}' outputs: - Type: String Name: InstanceId Selector: $..InstanceId - Type: String Name: LaunchTime Selector: $..LaunchTime - Type: MapList Name: Tags Selector: $.Reservations[0].Instances[0].Tags - name: RunScript action: aws:executeScript isEnd: true onFailure: Abort inputs: Runtime: python3.11 Handler: script_handler Script: |- def script_handler(events, context): data = { "InstanceId": events["InstanceId"], "LaunchTime": events["LaunchTime"], "Tags": events["Tags"] } return data InputPayload: InstanceId: '{{ describeInstance.InstanceId }}' LaunchTime: '{{ describeInstance.LaunchTime }}' Tags: '{{ describeInstance.Tags }}' outputs: - Type: String Name: InstanceId Selector: $.Payload.InstanceId - Type: String Name: LaunchTime Selector: $.Payload.LaunchTime - Type: MapList Name: Tags Selector: $.Payload.Tagsランブックを実行する
Section titled “ランブックを実行する”AWS System Manager Automation のページから Execute automation ボタンを押します。

Owned by me のタブから ExampleAutomation を選択します。
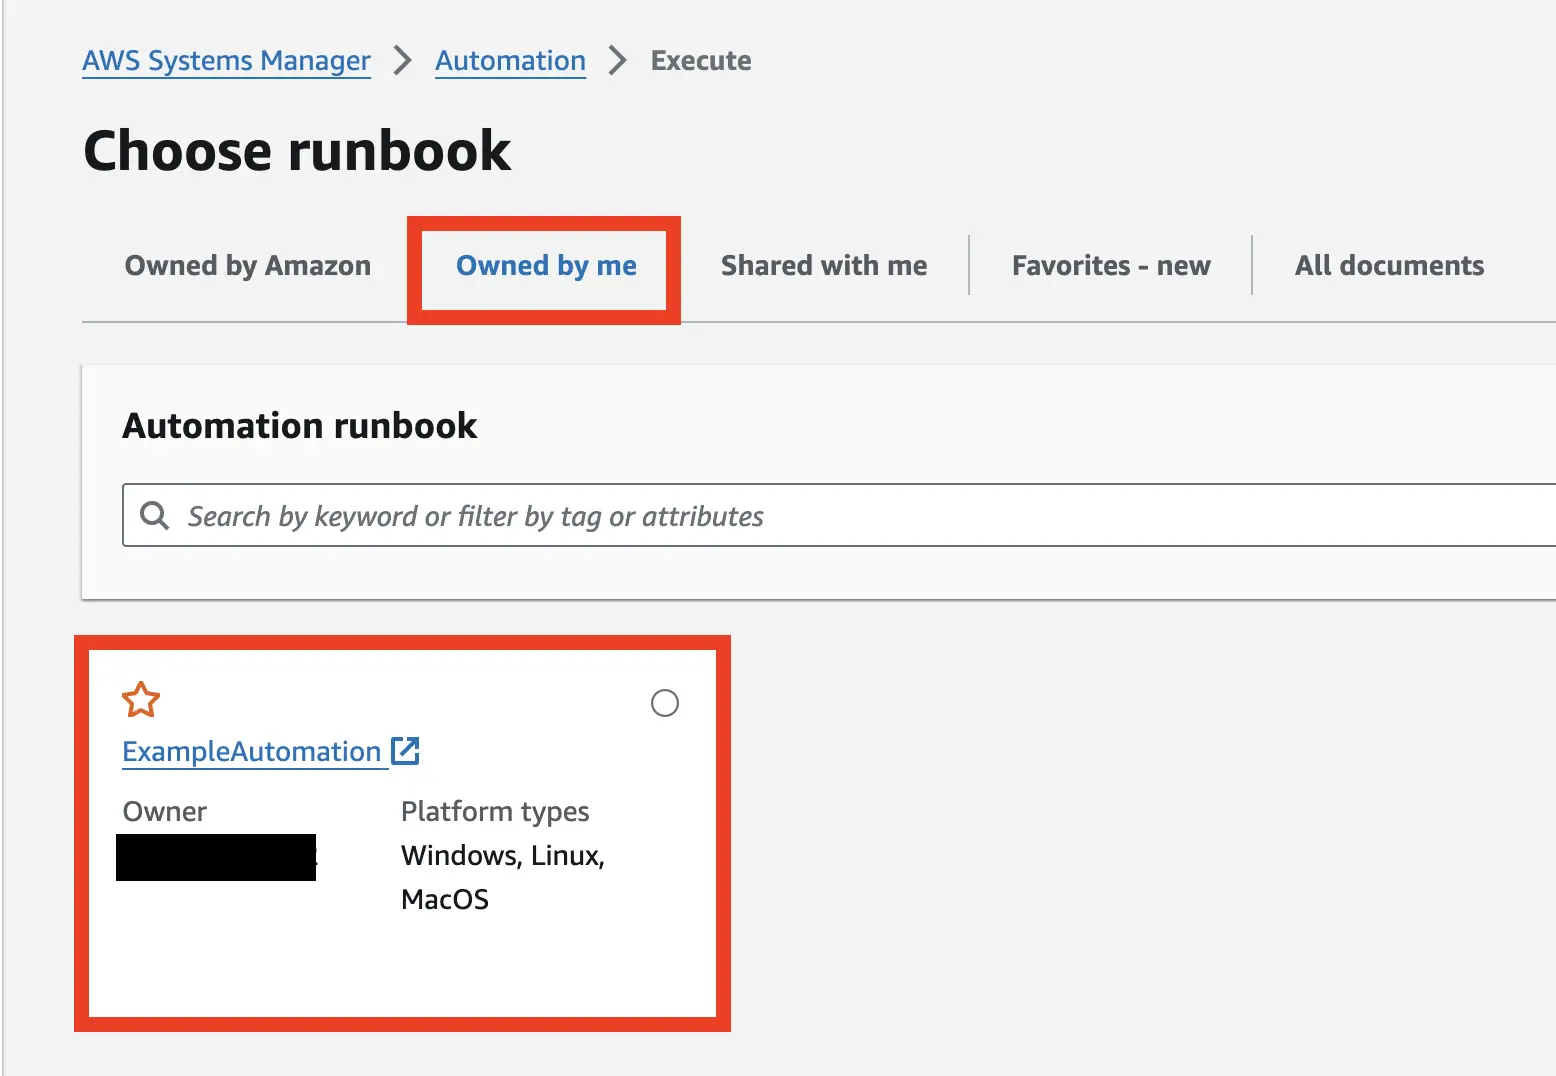
Systems Manager のドキュメントページに飛ばされるので、オートメーションを実行する ボタンを押します。

Rate control を選択し、Environment: sandbox のタグを付いているインスタンスを対象にします。
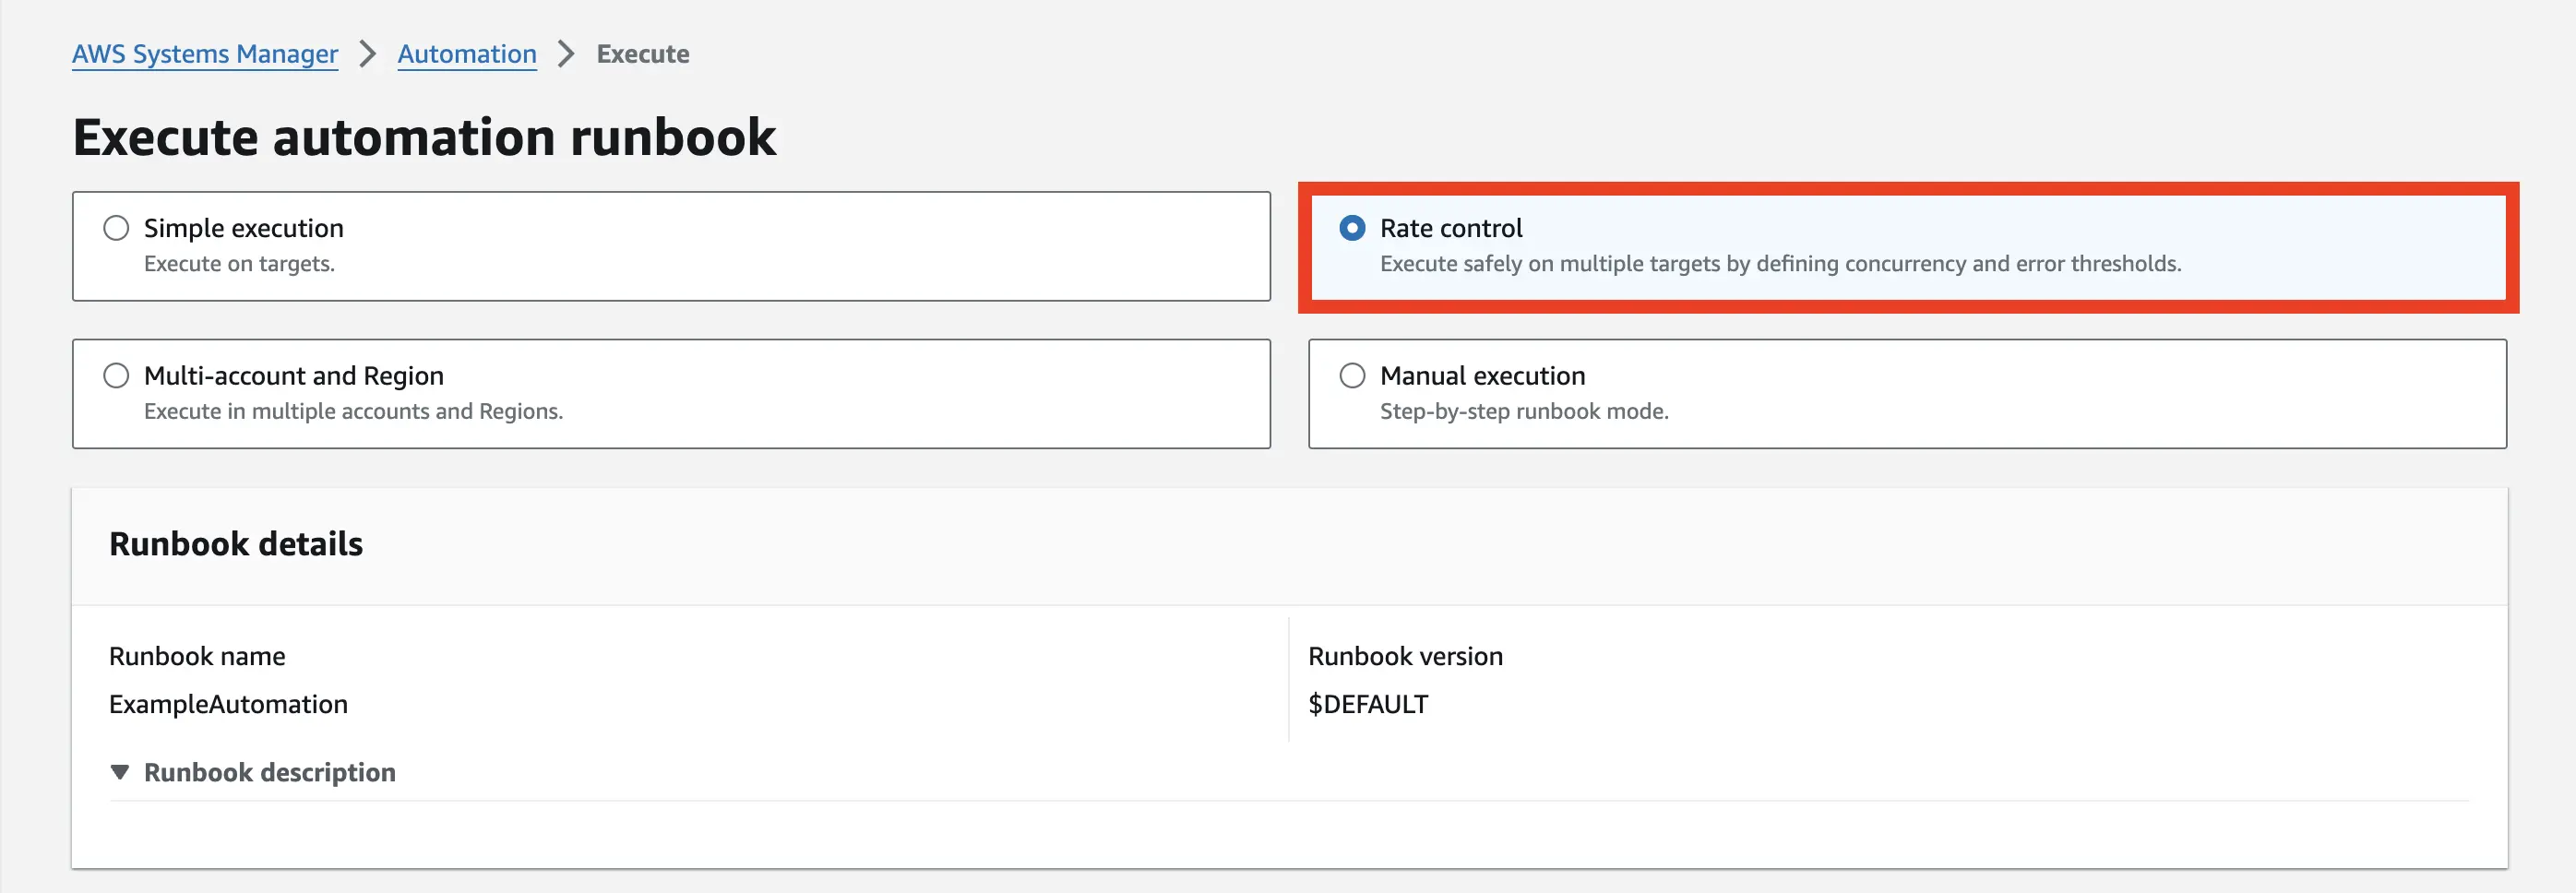
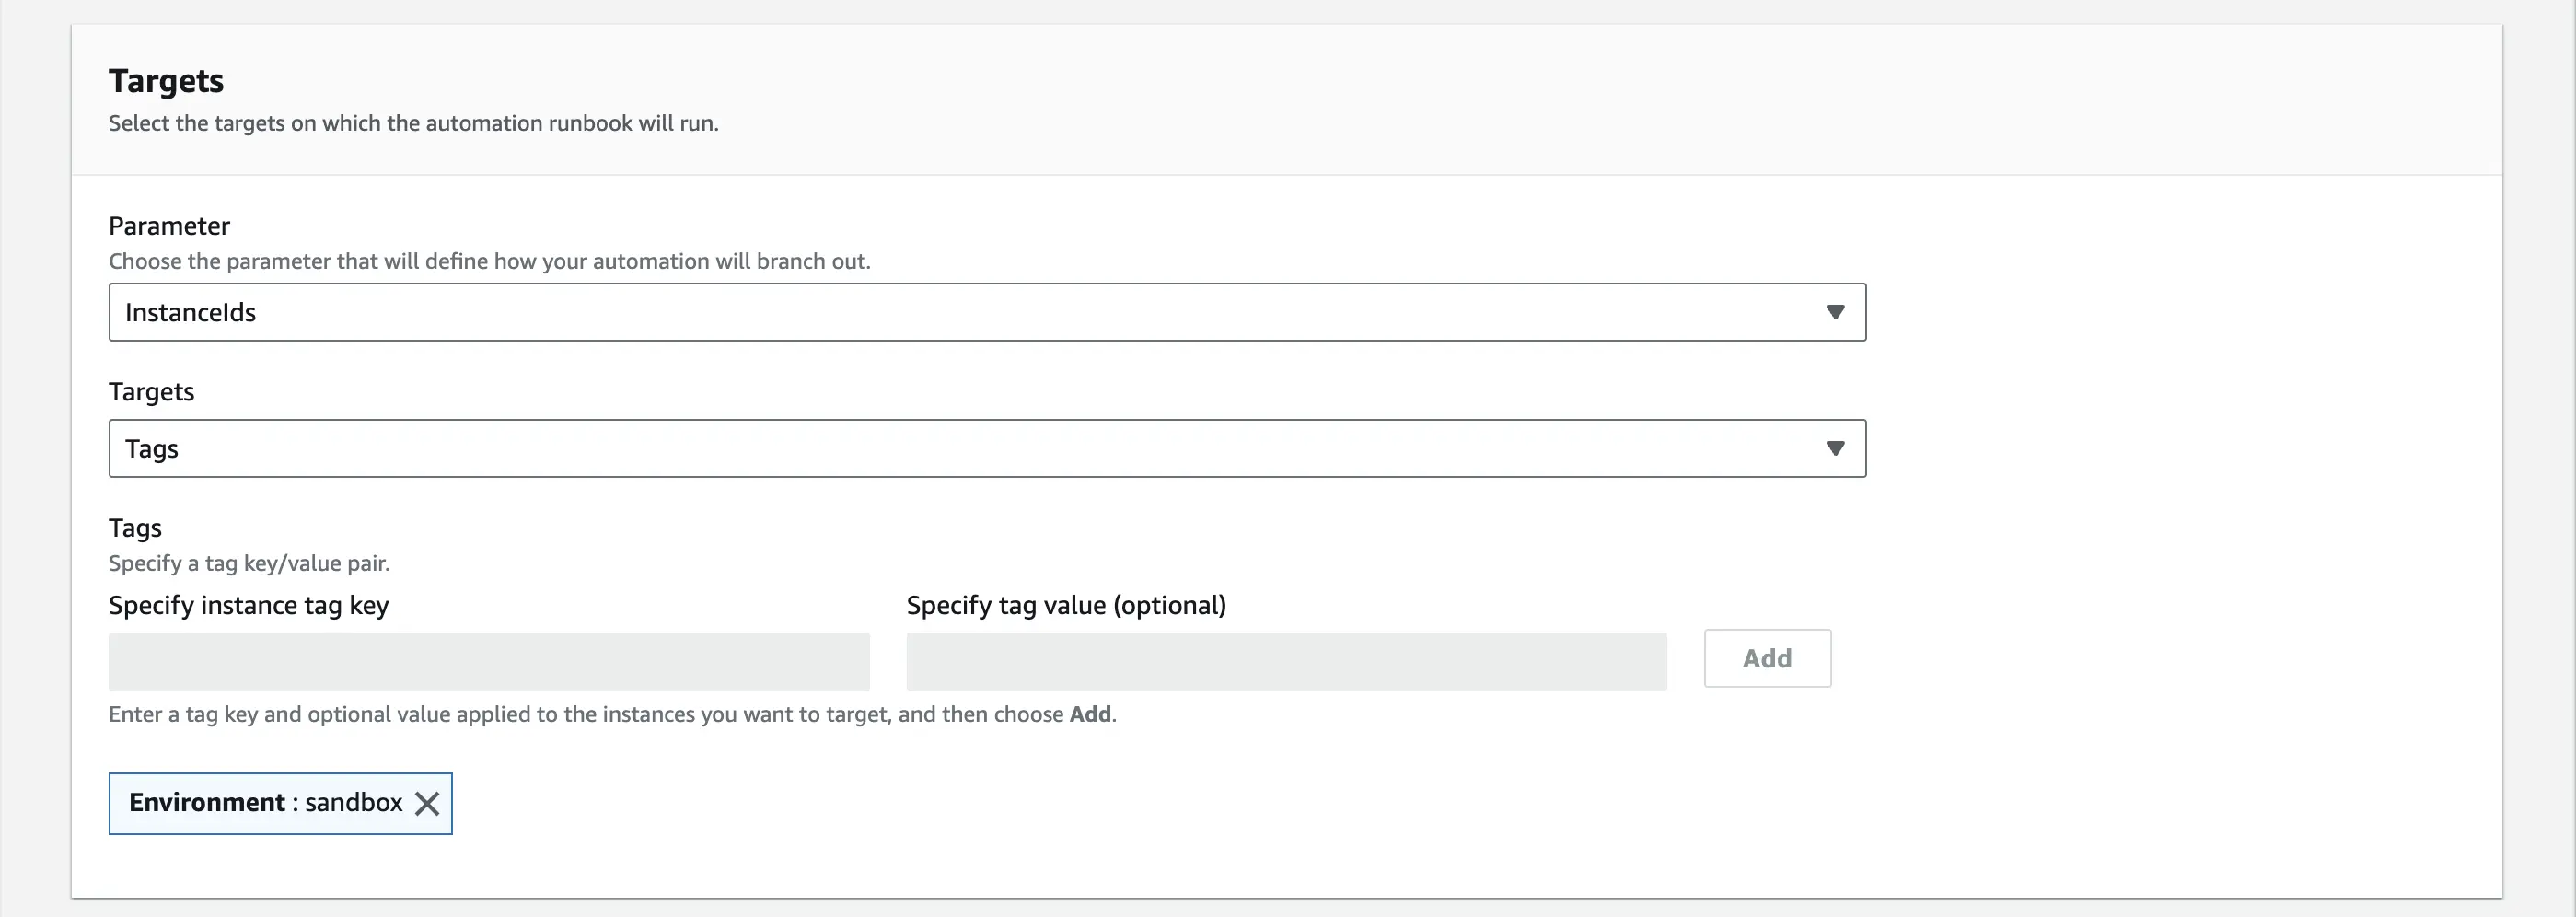
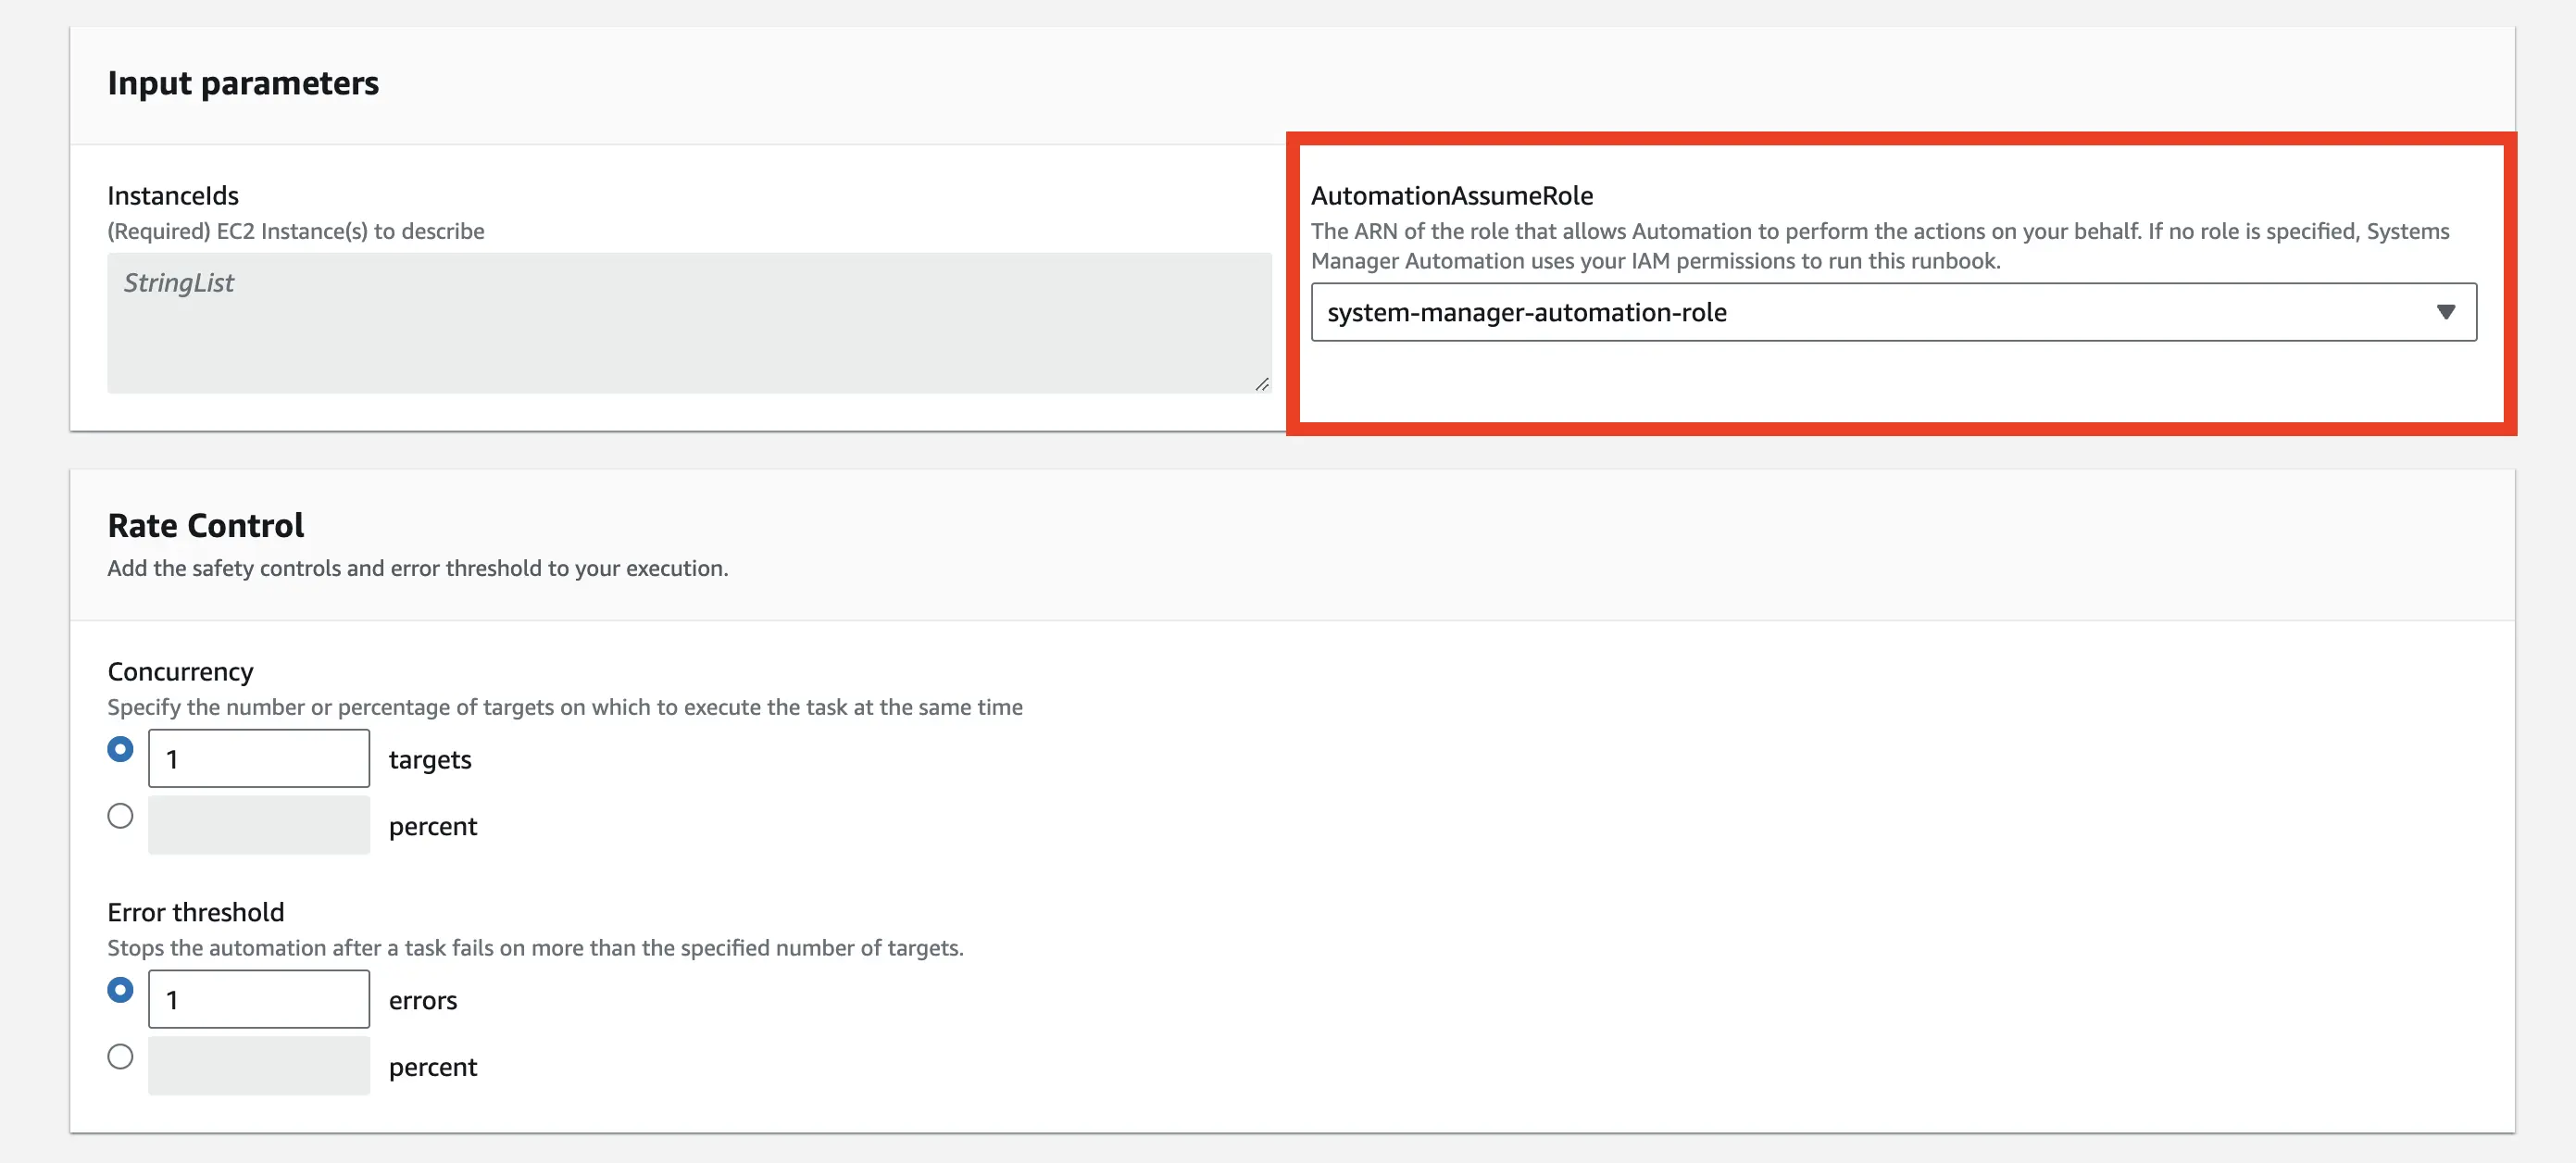
AssumeRole の設定を忘れずに行います。
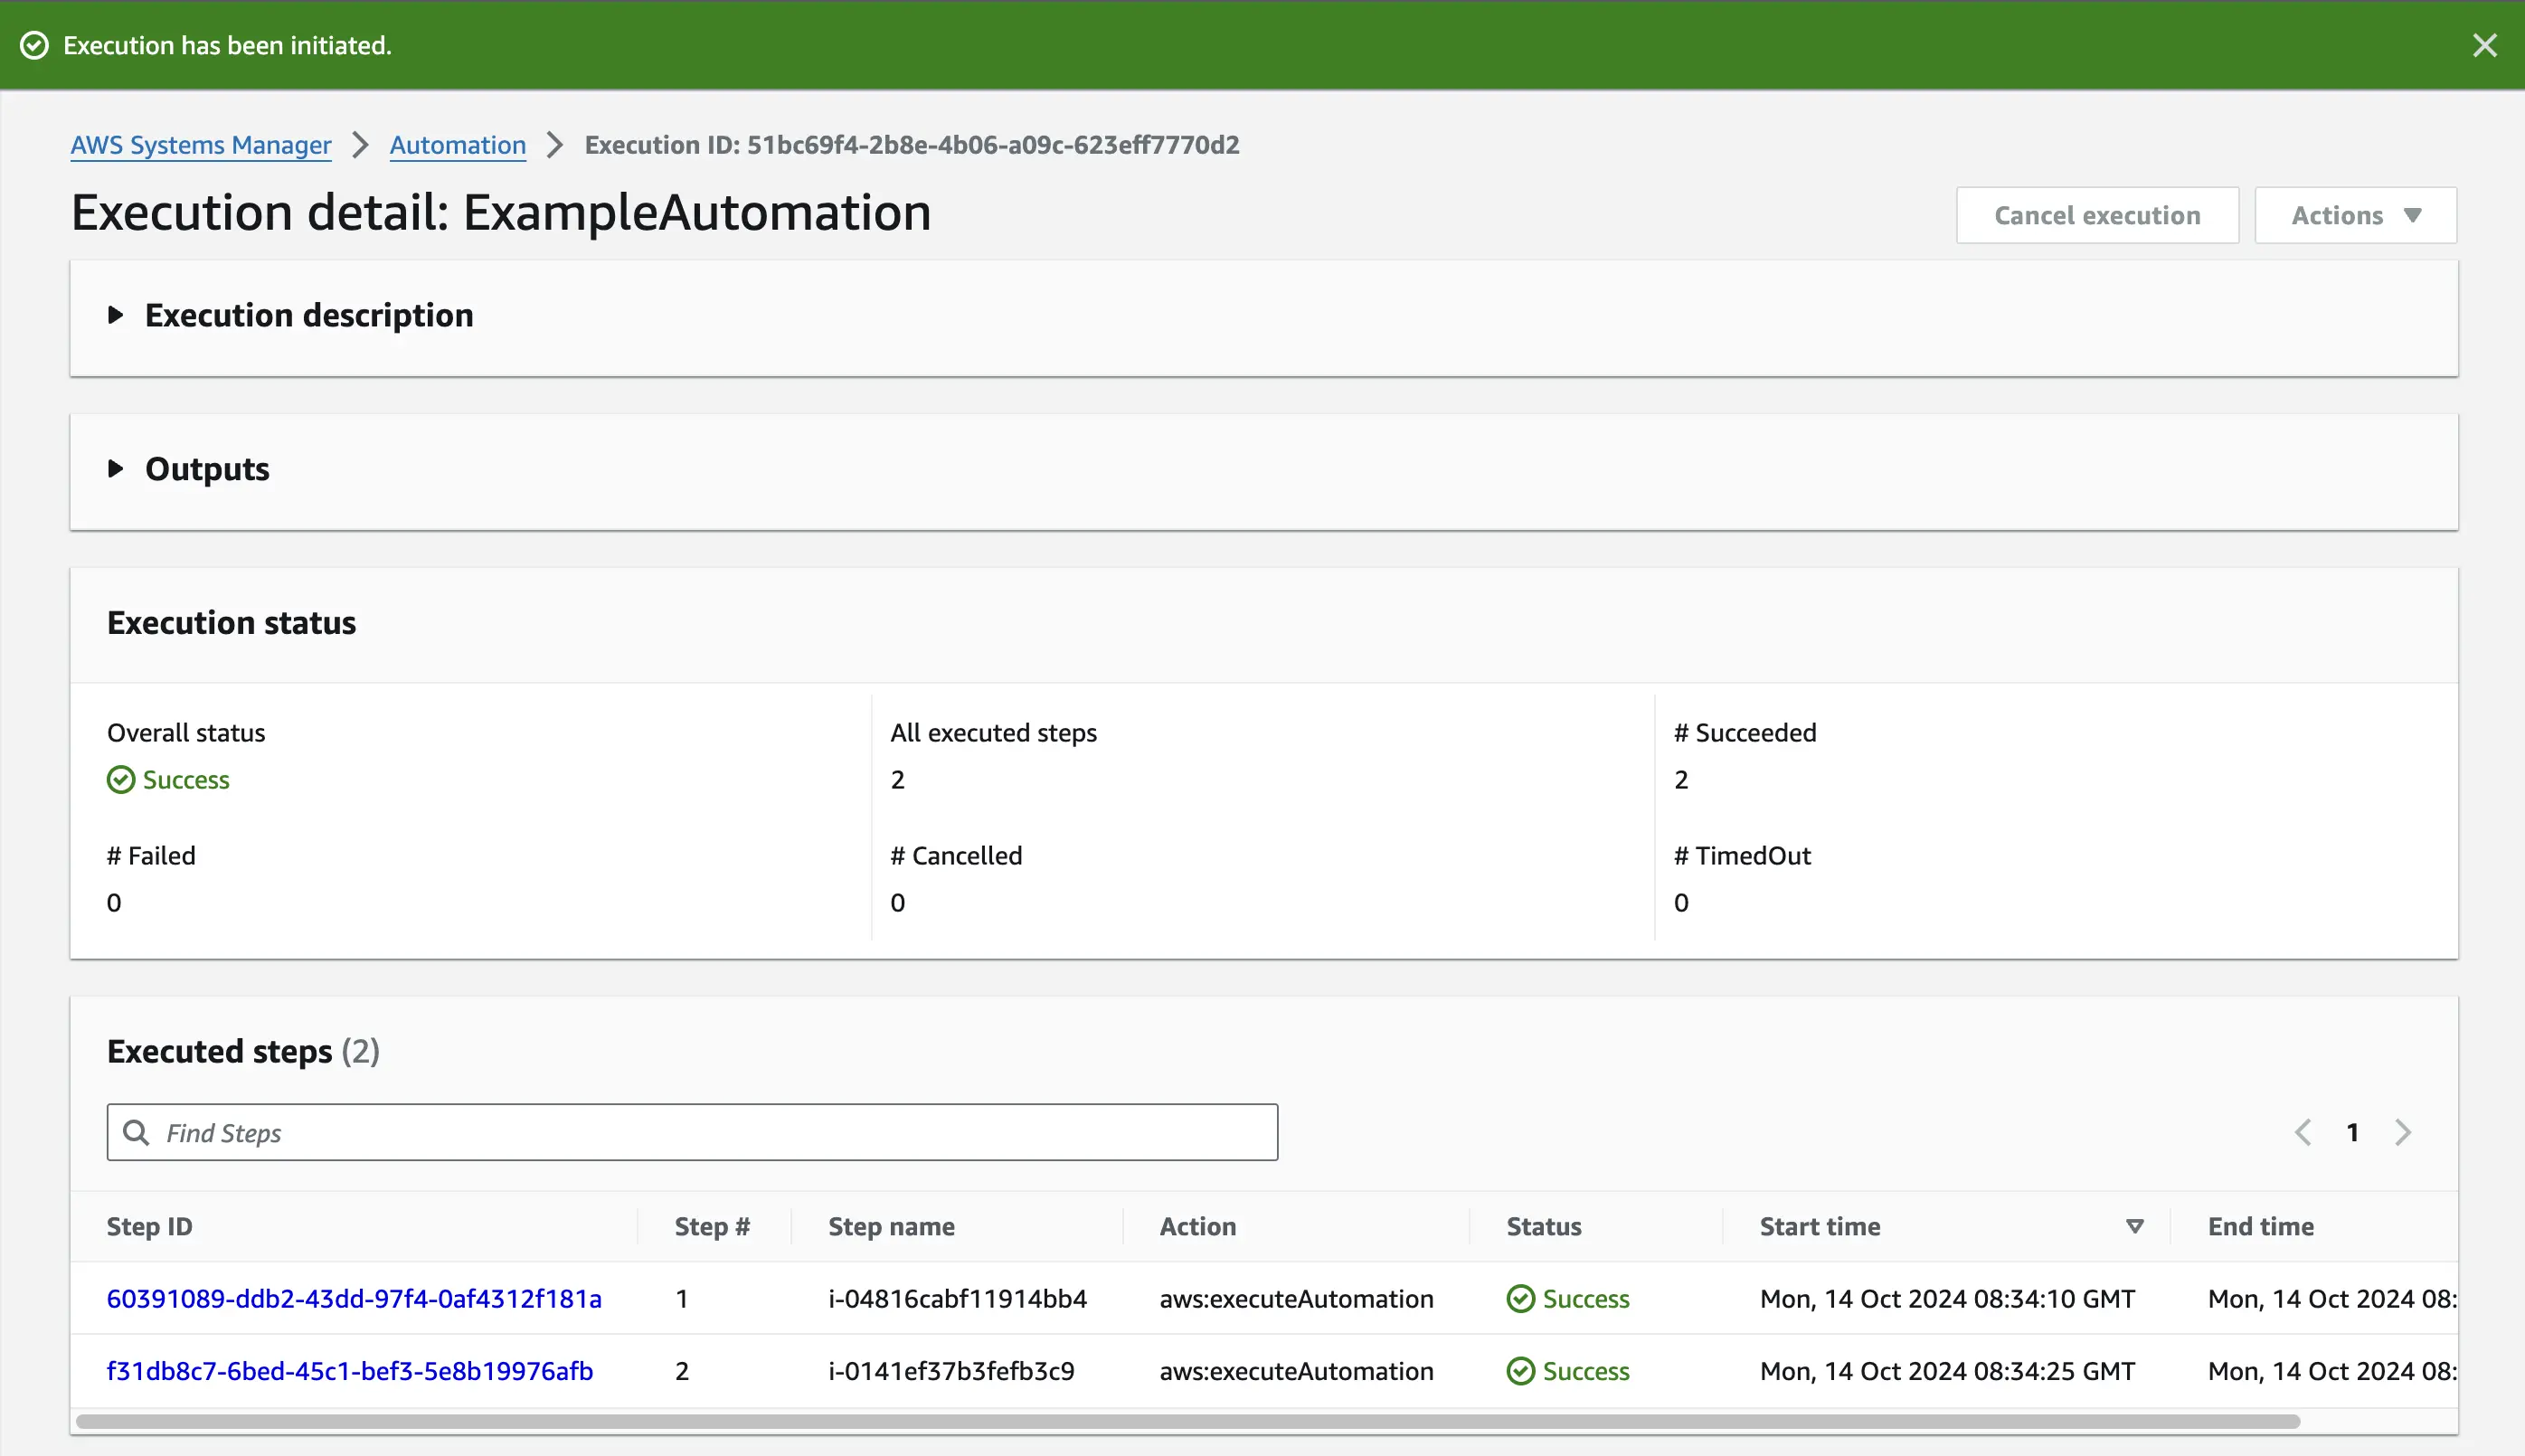
Execute ボタンを押すと、以下のような画面になります。
CloudWatch Logsを確認する
Section titled “CloudWatch Logsを確認する”CloudWatch Logs のロググループに記録されるログは、aws:executeScript かつ、その outputs です。(スクリプト内でprintを実行してもログに記録されませんでした)
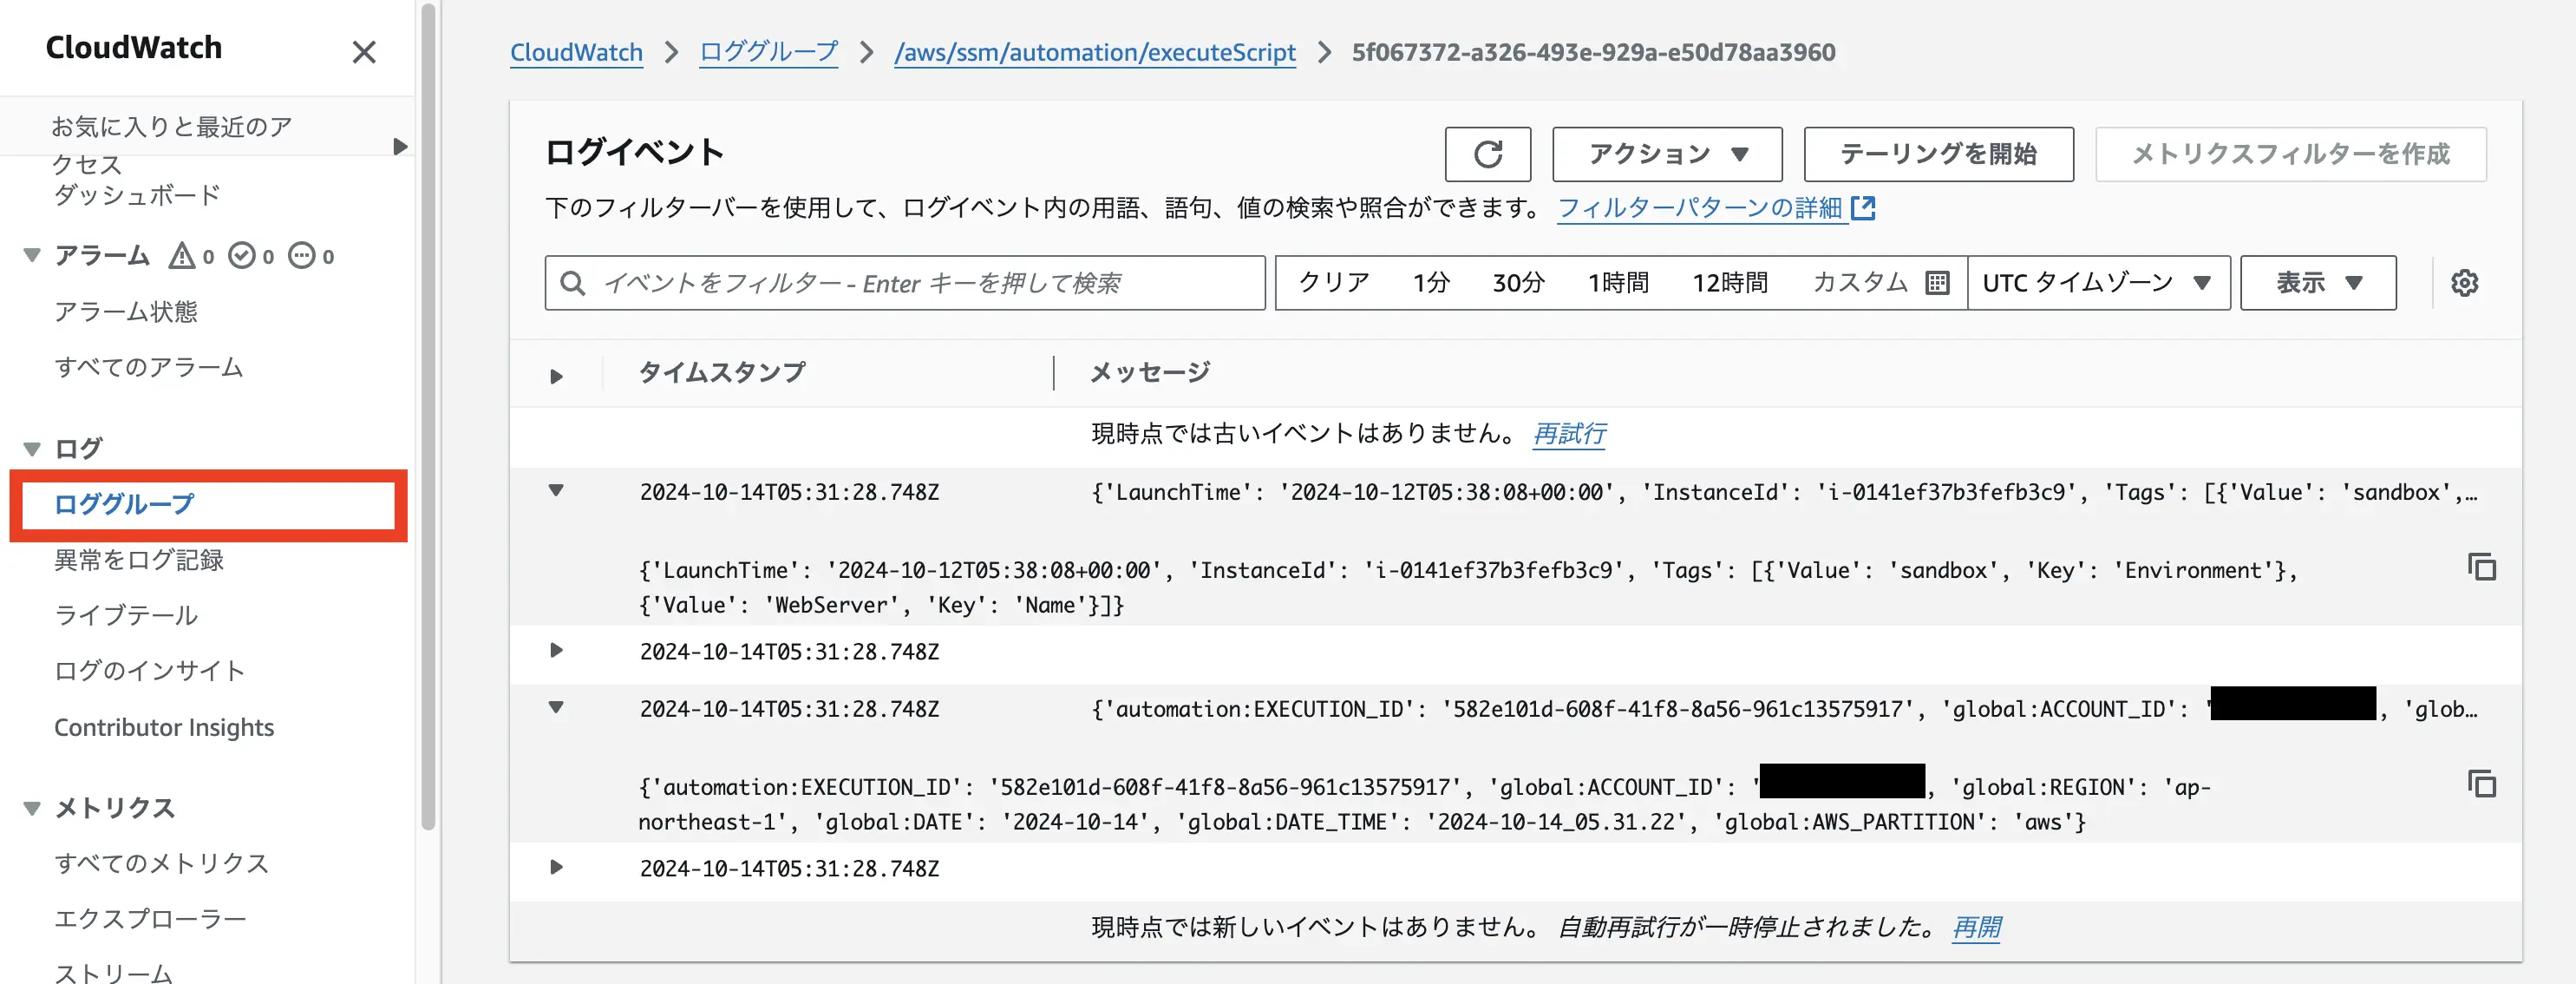
Systems Manager は、aws:executeScript アクションを使用しないドキュメント用にはロググループまたはログストリームを作成しません。ドキュメントが aws:executeScript を使用する場合、CloudWatch Logs に送信される出力は、それらのアクションにのみ関係します。
デバッグ目的で使用したい場合は、スクリプト内で outputs を定義する必要がありそうです。
デバッグおよびトラブルシューティングの目的で CloudWatch Logs のロググループに保存された aws:executeScript アクション出力を使用できます。